Managing users and user passwords can be done from Marin. In this article, we'll outline how each task can be done.
All users have the ability to manage their own user login and password, but the ability to create and edit other users is unique to users with Admin permissions. We'll talk more about what each type of user can do below.
User Types & Access Privileges
User Types
In Marin, there are two main types of users, Base Users and Admin Users.
-
Base: A Base user is a user who has access to all features within a given client account except for the ability to create and edit new users and client accounts. If a new user is created without Admin access, they are a Base user by default. The specific client account-level permissions can then be managed individually, for each client account (No Access, Read-only, and Write). We'll talk more about these options below.
Note: You won't see the word 'Base' when creating a user. A Base user is simply a user without Admin access.
-
Admin: This option can grant complete read and write access, and grants the ability to create and edit client accounts, change user privileges, add or remove users and client accounts, and create/edit client tags.
Any administrative user can grant this status to other users as well, by checking off the Admin user box within a user's settings page.
Note: It is possible to be an Admin user and not have read/write access to the client. Read/write access must be assigned to the user account via the client settings.
Access Privileges
On top of the type of user (Admin or Base), each user can also be granted specific permissions to each client account. These permissions are granted at the client account level and can vary from one client account to another, so it's possible to grant a user one type of permissions for one client account, and a different type of permissions for a different client account.
These privileges are as follows:
- No access: Users assigned No Access for a given client account will not see that particular client account appear in their Client drop-down menu.
- Read-only: The platform will appear the same as those with Write access. However, the user will only be able to view data and create reports, they cannot make changes within the application itself. The user will receive an error upon any change attempts. This type of user access can be beneficial if you have a customer or stakeholder who would like to see dashboards, run reports, and view data, but will not be making any changes to object status, bids, or other items.
- Write: Users assigned this privilege have full administrative rights within the permitted client accounts.
-
FTP: The user has the ability to connect to the FTP folders and files which are uploaded into the platform.
Note: FTP-Only access was previously granted from Marin Search, but cannot be granted from Marin. If you would like help granting this access, please reach out to a platform representative.
How To Change A User's Password
Please note that in order to edit another user (other than yourself), you will need to have a user login with Admin access. If you do not have a login with Admin access, we recommend working with other members of your team to add additional users. That said, you can still edit your own password as needed without Admin access.
- The first step, as always, is to log into Marin.
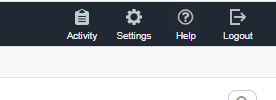
- Next, click on the Settings button ('gear' icon) in the top right-hand corner.
- From here, you'll click into the Clients & Users section.
- Next, you'll click on the Users sub-tab.
- Once you've located the user whose password you'd like to change, double-click or select and hit the edit icon on the user in the grid to launch the Side Panel. This is where you'll be able to change the user's password or make any necessary updates to user privileges.
- From the Side Panel, click on the Change Password button.
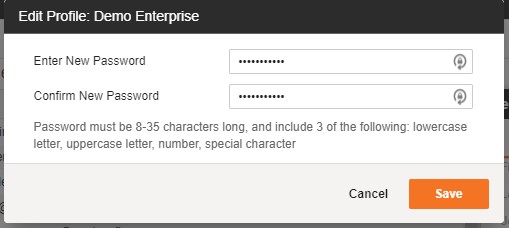
- Next, you'll enter the new password and enter it again for confirmation. Passwords must be 8-35 characters long and include 3 of the following: lowercase letter, uppercase letter, number, special character.
- Once your new password has been entered and confirmed, click Save. That's all there is to it!
How To Add A New User
Please note that in order to create a new user, you will need to have a user login with Admin access. If you do not have a login with Admin access, we recommend working with other members of your team to add additional users.
- The first step, as always, is to log into Marin.
- Next, click on the Settings button ('gear' icon) in the top right-hand corner.
- From here, you'll click into the Clients & Users section.
- Next, you'll click on the Users sub-tab.
- To create a new user, click on the Create button ('plus sign' + icon).
- Then, go ahead and enter the first name, last name, and email address of your new user.
If you use Chrome and already have a username and password saved through the Chrome password management tool, it's possible that the user interface may default the email address for your new user to your own saved email address. If you're creating new users for colleagues or someone else who may need access to Marin, you may find it necessary to temporarily turn off Chrome's password management tool for Marin so that you can create new users without the UI defaulting to your own email address.
If you find this is happening, click on the Key icon in your browser URL bar and delete your password from chrome. Be sure you log your password for your own records so you can then re-add it to Chrome's password management tool the next time you log in. - Next you'll have the opportunity to assign client privileges. This is where you will select the specific Marin client accounts your new user will have access to. To assign privileges, click on the client account box in the Client Privileges field.

- This will open up a separate overlay, where you will have the opportunity to select one or several Marin client accounts that live within the same Customer account. If your new user will have access to all Marin client accounts within your customer, you can use the super-select box to select everything.
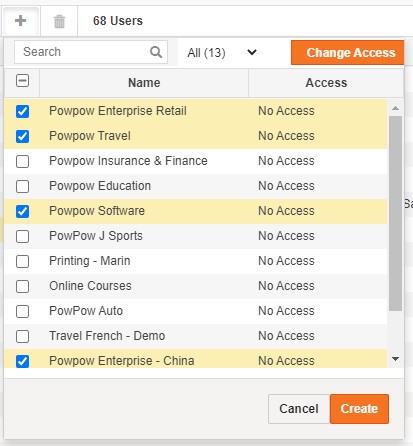
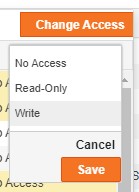
- Then, before you exit this overlay, you can select the specific access your new user will have by clicking on the Change Access button. Select from: No Access, Read Only, or Write access. These align with the access levels listed in the Access Privileges section earlier in this article.
- From here, click Save to confirm your new user's access level and return to the original user creation pane. When you return, you should see a comma separated list of all Marin client accounts your user can access.
- You will then enter a new password and confirm said password. Passwords must be 8-35 characters long and include 3 of the following: lowercase letter, uppercase letter, number, special character.
Please note that there is no "Reset Password upon Login" prompt, so if you are creating a new user for someone other than yourself, please instruct them to create a new, strong password upon logging in for the first time.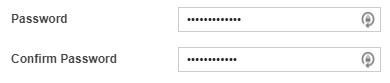
- Next, you will have the opportunity to assign Admin privileges to your new user. A Base User (non-Admin) has access to all Marin features in the client accounts to which they've been assigned, as well as the ability to edit their own user login details. On top of this, an Admin User can create new users, edit other users other than themselves (in the event of revoking privileges, password changes, etc.), and can create and edit client accounts. Please keep this distinction in mind as you create additional user logins so you can manage them effectively.

- The next step is to select your new user's display language.
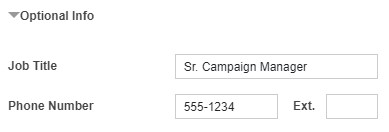
- Under Optional Info, you can enter your new user's job title and phone number. These details are not required in order to create your new user. These fields are editable, so if a job title or phone number changes, you can come back and update it later.
- Finally, click Create to finalize the process and create your new user.
- You will then see a notification above the grid indicating that your new user has been created. If there were any problems with your password authentication, you'll see this indicated in the same location.
- That's all there is to it! You can now manage your new user from the grid alongside all of your other users, and your new user can login with their brand new credentials.
How To Delete A User
Please note that in order to remove a user, you will need to have a user login with Admin access. If you do not have a login with Admin access, we recommend working with other members of your team to add additional users.
- The first step, as always, is to log into Marin.
- Next, click on the Settings button ('gear' icon) in the top right-hand corner.
- From here, you'll click into the Clients & Users section.
- Next, you'll click on the Users sub-tab.
- Click the check-box next to the specific user or users you would like to disable, then click the Delete button ('trash can' icon).

- A dialog box will appear asking you to confirm this step. Please keep in mind this process cannot be undone, so approach this decision thoughtfully.
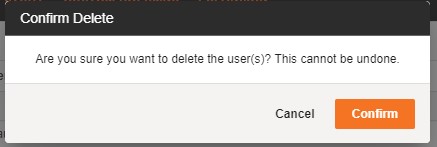
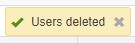
- Click Confirm to proceed. Once a user has been deleted, you should see a confirmation notification above the grid.
How To Change Or Remove Access Privileges To A Client Account
Please note that in order to update user access levels for users other than yourself, you will need to have a user login with Admin access. If you do not have a login with Admin access, we recommend working with other members of your team to add additional users.
- The first step, as always, is to log into Marin.
- Next, click on the Settings button ('gear' icon) in the top right-hand corner.
- From here, you'll click into the Clients & Users section.
- Next, you'll click on the Users sub-tab.
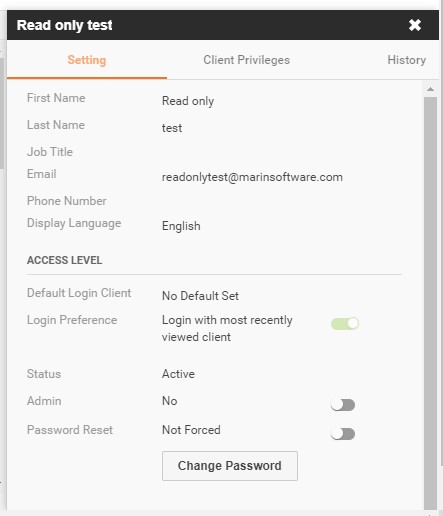
- Once you've located the user whose access you'd like to change, double-click on the user in the grid to launch the Side Panel. This is where you'll be able to make any necessary updates to user privileges or update their password.
- From the Side Panel, navigate to the Client Privileges tab.
- Select one or several Marin client accounts that the user has access to, then click the Change Access button.
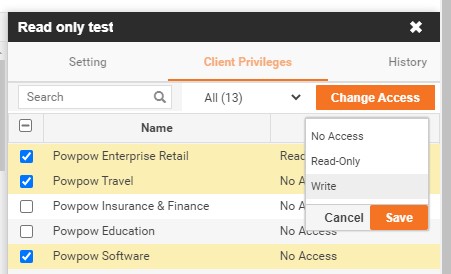
- From here, you can re-assign access to either No Access, Read-Only, or Write as needed.
- Finally, from the drop-down, click Save. If you need to make multiple changes to allow a user to be able to access or revoke access, repeat steps 7 and 8 as needed until all access levels are set properly.
Setting A Default Login Client Or Login Grid
- The first step, as always, is to log into Marin.
- Next, click on the Settings button ('gear' icon) in the top right-hand corner.
- From here, you'll click into the Clients & Users section and the Users sub-tab.
- Locate your own user in the list and double-click on it to launch the Side Panel.
Please note that you are only able to set a default login client or login grid for your own username.
- Click the Edit button ('pencil' icon) next to Default Login Client and type the name of the client you would like to set as your default. This means this is the account that will load when you log into Marin each day. Click Save to finalize your changes.
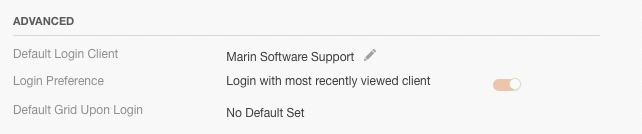
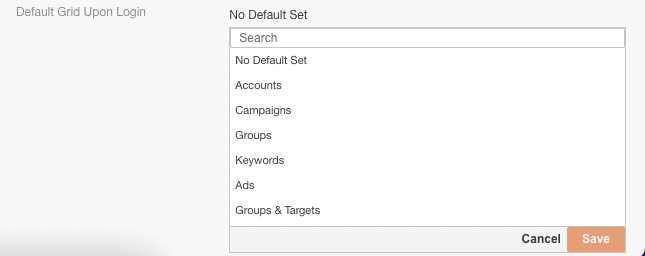
- Click the Edit button ('pencil' icon) next to Default Grid Upon Login and select the grid you would like to use as your default. This can be any of the main grids (Campaigns, Groups, Keywords, etc.). Click Save to finalize your changes.
- That's all there is to it! Close out the side panel when you are finished. You should see your updates reflected the next time you log in.
