Using bulk uploads, you can create or edit hundreds – or even thousands – of campaigns, groups, keywords, or ads in just a few steps.
This feature is supported across Marin, both Search and Social.
If you would prefer to edit objects via multi-edit in the grid, check out our dedicated article.
What Is A Bulk Upload?
As a marketer, it can be very time-consuming to add objects (such as keywords or creatives) to the platform manually. That's where the bulk upload functionality comes in handy.
With a bulk upload, you can add multiple objects all at once -- saving you time to work on something more important. Bulk uploads can be performed by either pasting details into a text box in the platform (up to 1000 rows), or by uploading a .csv or Unicode .txt file created in a spreadsheet program like Microsoft Excel.
Supported Objects
Bulk uploads are supported for the following objects:
- Campaigns
- Groups
- Keywords
- Negative Keywords
- Ads
- Placements
- Negative Placements
- Sitelink Extensions
- App Extensions
- Revenue
- Strategies
- Actions by Dimension
- Location Targets
- Product Groups
- Dynamic Targets
- Multi-Client
- Retargeting Lists
- Negative Retargeting Lists
- Cost
- ODAX (Meta)
How To Create A Bulk Sheet
Before you can create a bulk sheet, you need to know which columns to include. To do this, go to the main tab that contains the relevant objects (e.g. Keywords) and click the Upload button (in the upper-right in Marin).
Here, you'll see a list of [Optional] and Required columns.
- Optional columns are always enclosed in [square brackets], and are not required for the upload to be successful.
- Required columns will appear without square brackets, and must be included in your upload for it to be successful.
With that info to hand, follow these steps:
- Open a spreadsheet editor like Microsoft Excel.
- Replicate the column headers (as above) in row one of a new spreadsheet.
- Fill in each of the values in the columns; for example, Account, Keyword, [Status], etc.
Note: Including blank rows or columns in your bulksheet can lead to unexpected results. Check out our dedicated article if you'd like to learn more. - Save your bulk sheet as a Unicode .txt file or .csv. You can also .zip your file for quicker processing.
- From here, you can either copy/paste the contents of your bulk sheet or upload the entire file. We'll review each option in more detail later in this article.
Required Headers
Files must have all required headers for an edit upload to process successfully. Required headers for a few of the most common object levels are as follows:
- Campaigns - Account, Campaign
- Groups - Account, Campaign, Group
- Keywords - Account, Campaign, Group, Keyword. Match Type and Status are optional but recommended.
- Creatives - Account, Campaign, Group, Headline, Description Line 1, Creative Type, Status, Display URL, Landing Page*
*Note that Landing Page is a required header for creating new creatives, but not for editing existing.
- Sitelinks - Account, Campaign, Link Text and either Destination URL or Landing Page are required for creating a new sitelink. Sitelink ID is a required column for editing existing sitelinks. Account, Campaign, and Sitelink ID are required for sharing a sitelink with another campaign. To learn more about managing sitelinks in bulk, check out our dedicated article here.
Optional column headers in your bulk upload that you are not using, you should remove these. If you don't, errors may occur.
To learn the required headers for additional object levels, simply follow the instructions below for Accessing Bulk Uploads, select the desired object level of your upload, and take a look at the columns. Required columns will be indicated and optional columns will appear in [square brackets].
Please note: keyword text cannot be modified. This will always create new keywords. This is true in Marin as well as on the publisher side.
Accessing Bulk Uploads
- First, log into Marin, as usual.
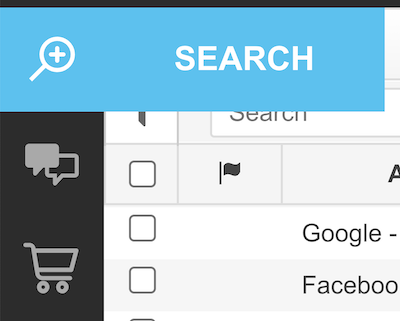
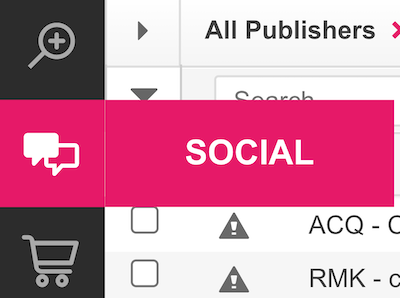
- Next, navigate to either the Search tab ('magnifying glass' icon) or Social tab ('chat box' icon) in the left-hand navigation. There are slight differences in the workflows between Search and Social; we'll address these differences accordingly. If no differences are mentioned, then this indicates that the workflow is the same in both locations.
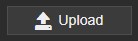
- Click on the Bulk Upload button ('arrow' icon) in the top-right, just above the grid. Depending on the size of your browser window and your screen resolution, this button will either look like an arrow or an arrow with the word Upload.

- From the top-left corner of the Bulk Upload pane, select your upload type (Campaign, Group, etc.).
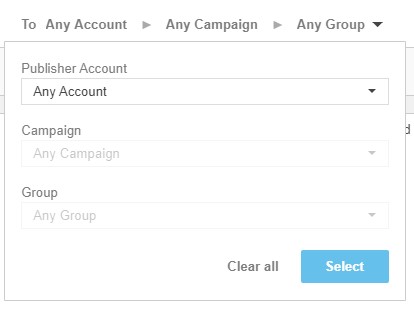
We are in the process of adding additional upload types over the course of the next several months, so be on the lookout for updates. - In Marin Search, you'll then have the option to determine where you would like your upload to take place. You can specify the publisher account, campaign, and group.
- Next, you can complete your bulk upload by either copying and pasting in the relevant upload information or by loading in a pre-prepared file. We'll talk through each of these options in more detail in the coming sections.
Uploading Via Copy And Paste
- First, go ahead and copy your bulk upload, including headers, and paste it into the blank text box.
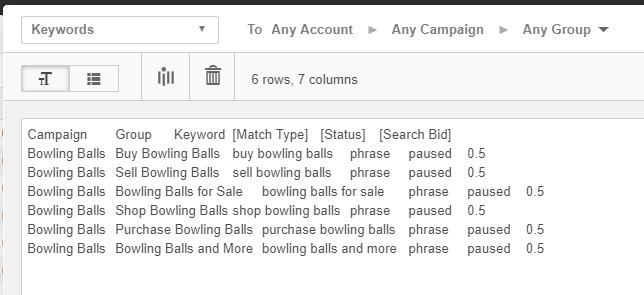
- Above your text box, you'll see two modes for pasting in your upload.
-
Text Mode, which allows you to paste copied data into your text box without applying additional formatting.

-
Grid Mode, which re-formats your pasted data and allows you to sort columns and check for errors.

In Marin Social, Grid Mode will show any problematic cells highlighted in pink or with a red exclamation, giving additional information about the errors.
In both Marin Search and Social, you can double-click into a cell to make edits or corrections in-line, directly in the text box, prior to processing.
-
Text Mode, which allows you to paste copied data into your text box without applying additional formatting.
-
Add a Row ('plus sign' icon) allows you to add a row to your existing upload.
Note: This option is only available in Grid Mode.
-
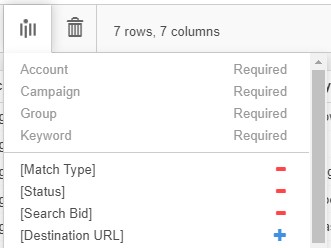
Edit columns gives you the option to remove or rearrange any non-required columns. All column headers in brackets are optional. Click the red 'minus' icon to remove an optional column and the blue 'plus' icon to add an additional column.
- The Clear all button ('trash can' icon) removes everything from your text box so you can start from scratch.
Use caution with this button, since it will clear out your entire upload. If, instead, you only need to update a few cells, use the id Mode to edit cells in-line.
- Prior to kicking off your upload, choose the relevant status in which you'd like your bulk upload to take place. These options vary somewhat between Marin Search and Marin Social, so we'll address each accordingly below.
-
Search: To Be Sent status queues up your changes to be sent out automatically the next time Marin syncs with the publisher. Hold allows you to manually hold your changes in Marin until you're ready to sync with the publisher. Keep in mind that Hold requires you to manually post your changes to the publisher and your upload will not be posted the next time Marin syncs with the publisher -- you will need to post these changes to the publisher manually.

-
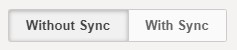
Social: Similar to the options that are available for Search, With Sync queues up your changes to be sent out automatically the next time Marin syncs with the publisher. Without Sync allows you to manually hold your changes in Marin until you're ready to sync with the publisher. Keep in mind that Without Sync requiresyou to manually post your changes to the publisher and your upload will not be posted the next time Marin syncs with the publisher -- you will need to post these changes to the publisher manually.

-
Search: To Be Sent status queues up your changes to be sent out automatically the next time Marin syncs with the publisher. Hold allows you to manually hold your changes in Marin until you're ready to sync with the publisher. Keep in mind that Hold requires you to manually post your changes to the publisher and your upload will not be posted the next time Marin syncs with the publisher -- you will need to post these changes to the publisher manually.
- When uploading at the keyword level, at the bottom of the upload pane, you can choose either Create or edit keywords or Create new campaigns, groups and keywords. This refers to our Implicit Create functionality, a tool that allows you to upload new campaigns, groups, and keywords from a single bulksheet. This functionality is unique to Marin Search (it's not yet available in Marin Social) and works across Google, Microsoft, and Amazon.
If you'd prefer to only upload keywords and would like to upload to existing groups and campaigns, you should select Create or edit keywords. If you'd like Marin to create keywords in existing campaigns or groups OR edit existing keywords, you'll choose this option. If you'd like Marin to create the corresponding new campaigns and groups that are referenced in your bulksheet, you'll want to instead select Create new campaigns, groups and keywords. The latter option is great for when you have a bunch of new keywords, groups, and campaigns to create all at once. - If you selected the option to create new campaigns and groups from the same upload, you will see additional options appear. From here, you'll be able to assign the Campaign Type, Distribution, Microsoft Group Language, Group Bid, and Daily Budget that will be used for your new campaigns and groups.
It's important to note that these settings will apply to ALL objects created, however, with the exception of Campaign Type and Microsoft Group Language, these settings are editable and can be revised after creation. If you need to use different settings for different campaigns, we recommend batching your bulksheets by settings.
- When your upload is ready, click Submit.

Uploading Via Saved File
Please note that, due to the deprecation of Flash in Google Chrome browsers, uploading via a saved file is currently only available in Marin.
- First, prepare your bulk upload in a text file, in Excel, or in the spreadsheet tool of your choice. For Marin Social, save it as a .CSV file. For Marin Search, you can save it as a .CSV or .TXT file.
You can copy and paste column headers directly from Marin into your file to get started.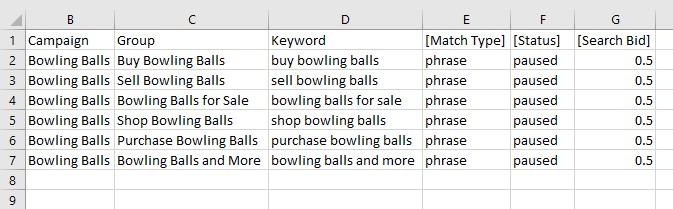
- Once your file has been prepared, head back to Marin. At the bottom of the Bulk Upload pane, click on the Select File button.

- Select your pre-prepared file and click Open. We'll review the relevant file requirements in the next section.
- Choose the relevant status in which you'd like your bulk upload to take place. These options vary somewhat between Marin Search and Marin Social, so we'll address each accordingly below.
-
Search: To Be Sent status queues up your changes to be sent out automatically the next time Marin syncs with the publisher. Hold allows you to manually hold your changes in Marin until you're ready to sync with the publisher. Keep in mind that Hold requires you to manually post your changes to the publisher and your upload will not be posted the next time Marin syncs with the publisher -- you will need to post these changes to the publisher manually.

-
Social: Similar to the options that are available for Search, With Sync queues up your changes to be sent out automatically the next time Marin syncs with the publisher. Without Sync allows you to manually hold your changes in Marin until you're ready to sync with the publisher. Keep in mind that Without Sync requires you to manually post your changes to the publisher and your upload will not be posted the next time Marin syncs with the publisher -- you will need to post these changes to the publisher manually.
-
Search: To Be Sent status queues up your changes to be sent out automatically the next time Marin syncs with the publisher. Hold allows you to manually hold your changes in Marin until you're ready to sync with the publisher. Keep in mind that Hold requires you to manually post your changes to the publisher and your upload will not be posted the next time Marin syncs with the publisher -- you will need to post these changes to the publisher manually.
- When uploading at the keyword level, at the bottom of the upload pane, you can choose either Create or edit keywords or Create new campaigns, groups and keywords. This refers to our Implicit Create functionality, a tool that allows you to upload new campaigns, groups, and keywords from a single bulksheet. This functionality is unique to Marin Search (it's not yet available in Marin Social) and works across Google, Microsoft, and Amazon.
If you'd prefer to only upload keywords and would like to upload to existing groups and campaigns, you should select Create or edit keywords. If you'd like Marin to create keywords in existing campaigns or groups OR edit existing keywords, you'll choose this option. If you'd like Marin to create the corresponding new campaigns and groups that are referenced in your bulksheet, you'll want to instead select Create new campaigns, groups and keywords. The latter option is great for when you have a bunch of new keywords, groups, and campaigns to create all at once. - If you selected the option to create new campaigns and groups from the same upload, you will see additional options appear. From here, you'll be able to assign the Campaign Type, Distribution, Microsoft Group Language, Group Bid, and Daily Budget that will be used for your new campaigns and groups.
It's important to note that these settings will apply to ALL objects created, however, with the exception of Campaign Type and Microsoft Group Language, these settings are editable and can be revised after creation. If you need to use different settings for different campaigns, we recommend batching your bulksheets by settings.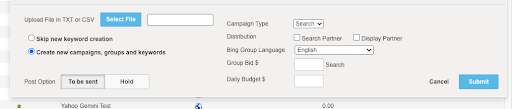
- When your upload is ready, click Submit.

File Requirements
- For Marin Social, your bulksheet must be a .CSV. For Marin Search, your bulksheet can be a .CSV or .TXT file. Zip files are not supported.
- CSV data can be delimited by comma or tab.
- Text files must be in Unicode format.
Check Upload Status & Download Reports
To see the status of your bulk upload, from any page in Marin, click the Activity Log button.
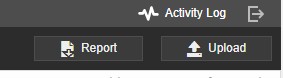
From here, you can apply filters, check the Job Status column, and more to verify that your upload has completed successfully. To learn more about the Activity Log in Marin, check out our dedicated article.
Additional Information
- When bulk uploading into the platform, it is important to always monitor the process in the Activity Log to verify if the upload failed, succeeded or even partially succeeded.
- For uploads that did not fully succeed, please click on the error file or Activity Log ID number to see the error in question and search that error in our help section to find a quick resolution
- If you attempt to edit an object that has not yet been successfully pushed to the publisher, you may see a creation operation in the Activity Log.
- When creating Account, group or campaign names, having non-alphanumeric characters like # or * in front of the name can cause errors when bulk editing
- Please note, any files containing a non-standard character (such as accents or characters from foreign languages) need to be saved in Unicode text format in order to maintain these characters upon upload. Failure to do so may lead to incorrect formatting of uploads.
- If you are doing a bulk upload to update existing keywords, make sure the Unicode text formatted keyword is an exact match in the bulk upload. Otherwise, the app will detect a new keyword. This is because a non-standard character was not properly encoded, so it doesn't match the existing keyword in the app.
- Optional column headers in your bulk upload that you are not using, you should remove these. If you don't, errors may occur.
Search Support:
- Bulk upload of Dimensions is available
- To map campaigns or groups to a Strategy, simply include the Strategy column and map in at the relevant hierarchy level for your needs.
Social Support:
- Facebook Campaigns and Ads are currently supported.
- Only the following ad types are supported:
- Page Post Ad
- Page Like Ad
- Lead Gen Ad
- Mobile App Install Ad
- Carousel Ad
- All campaign types except Dynamic Ads are supported.
- Campaign creation requires an existing Media Plan.
- Ad creation requires an existing Saved Audience and Campaign.
- Updating the fields Budget, Status, or Bidding requires the With Sync option to be selected, as those changes are directly pushed to the publisher.
- Bulk upload of Dimensions is available.
