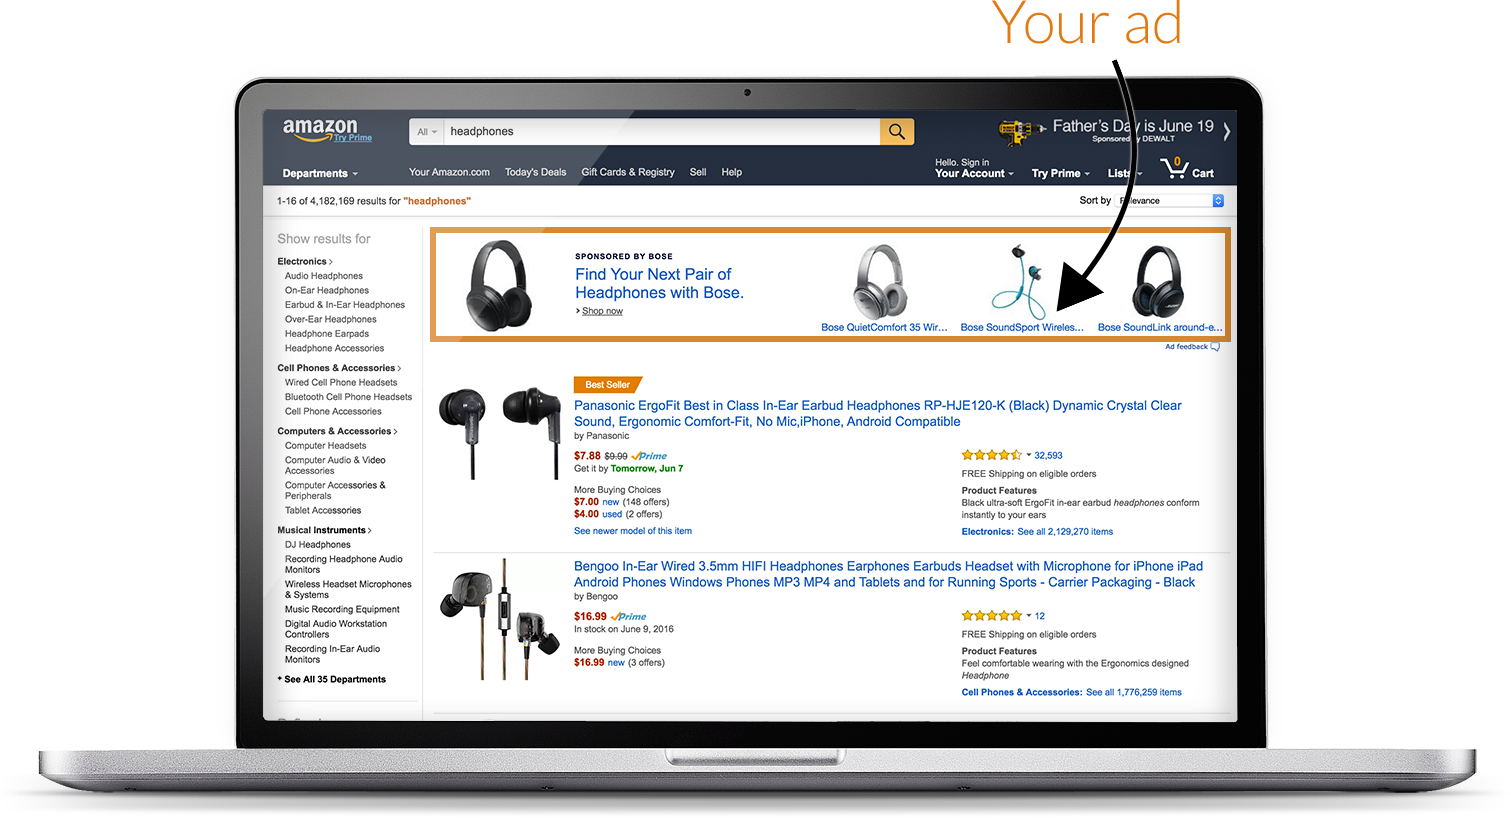
Amazon Advertising is Amazon's paid search and display program that allows you you to tap into a global customer base of more than 300 million shoppers on Amazon's websites, targeted by either keywords or specific products.
Our unique Amazon integration allows you to import your Amazon Advertising campaigns into our platform, enabling you to view and comprehensively manage your Amazon campaigns, as well as accessing our full suite of automated bidding and reporting options.
In this article, we'll explain how to get started with Amazon Advertising in MarinOne.
Handy Tip
If you'd like to learn more about bidding for Amazon accounts, check out our Bidding on Amazon Advertising article.
Support For Amazon Advertising
Below we'll list the Amazon features currently available in MarinOne.
- Link Amazon accounts and Sponsored Products, Sponsored Brands, and Sponsored Display campaigns.
- Create or edit objects in bulk (e.g. campaigns, ad groups, keywords, creatives).
- Edit objects in the grid using the platform's multi-edit feature.
- Create or edit objects via FTP.
- Sync your groups anytime (available via nightly sync and manual sync).
- Use the full suite of sorting and filtering options in the MarinOne grids.
- View a detailed change history for campaigns, groups, and keyword settings.
Step-By-Step: Linking Accounts And Campaigns
To link your Amazon account to MarinOne and sync your Amazon campaigns, just follow the steps below.
- First, log into MarinOne as normal and click into the Ecommerce or Search module in the left-hand navigation. Amazon publisher accounts can be linked into either module.
- Next, click into the main Publishers tab in the upper menu.
- Open the Linking Wizard by clicking the 'Manage Accounts' icon above the grid.
- When the Linking Wizard appears, click the Add Publisher Account button in the lower-left corner.
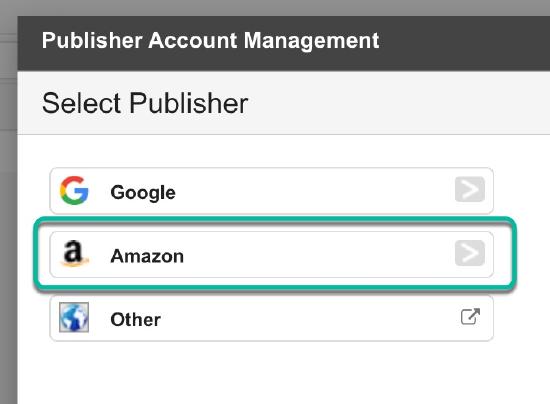
- To add your Amazon account, select Amazon from the list of publishers.
- In the right pane of the Linking Wizard, you should now see a field: Nickname.
To add your account successfully, you'll need to fill in this field. Simply enter the name you'd like to use for your account (for example, "PowPowSports Amazon 1").
Your actual credentials will be entered in the next step, so don't worry about this field too much.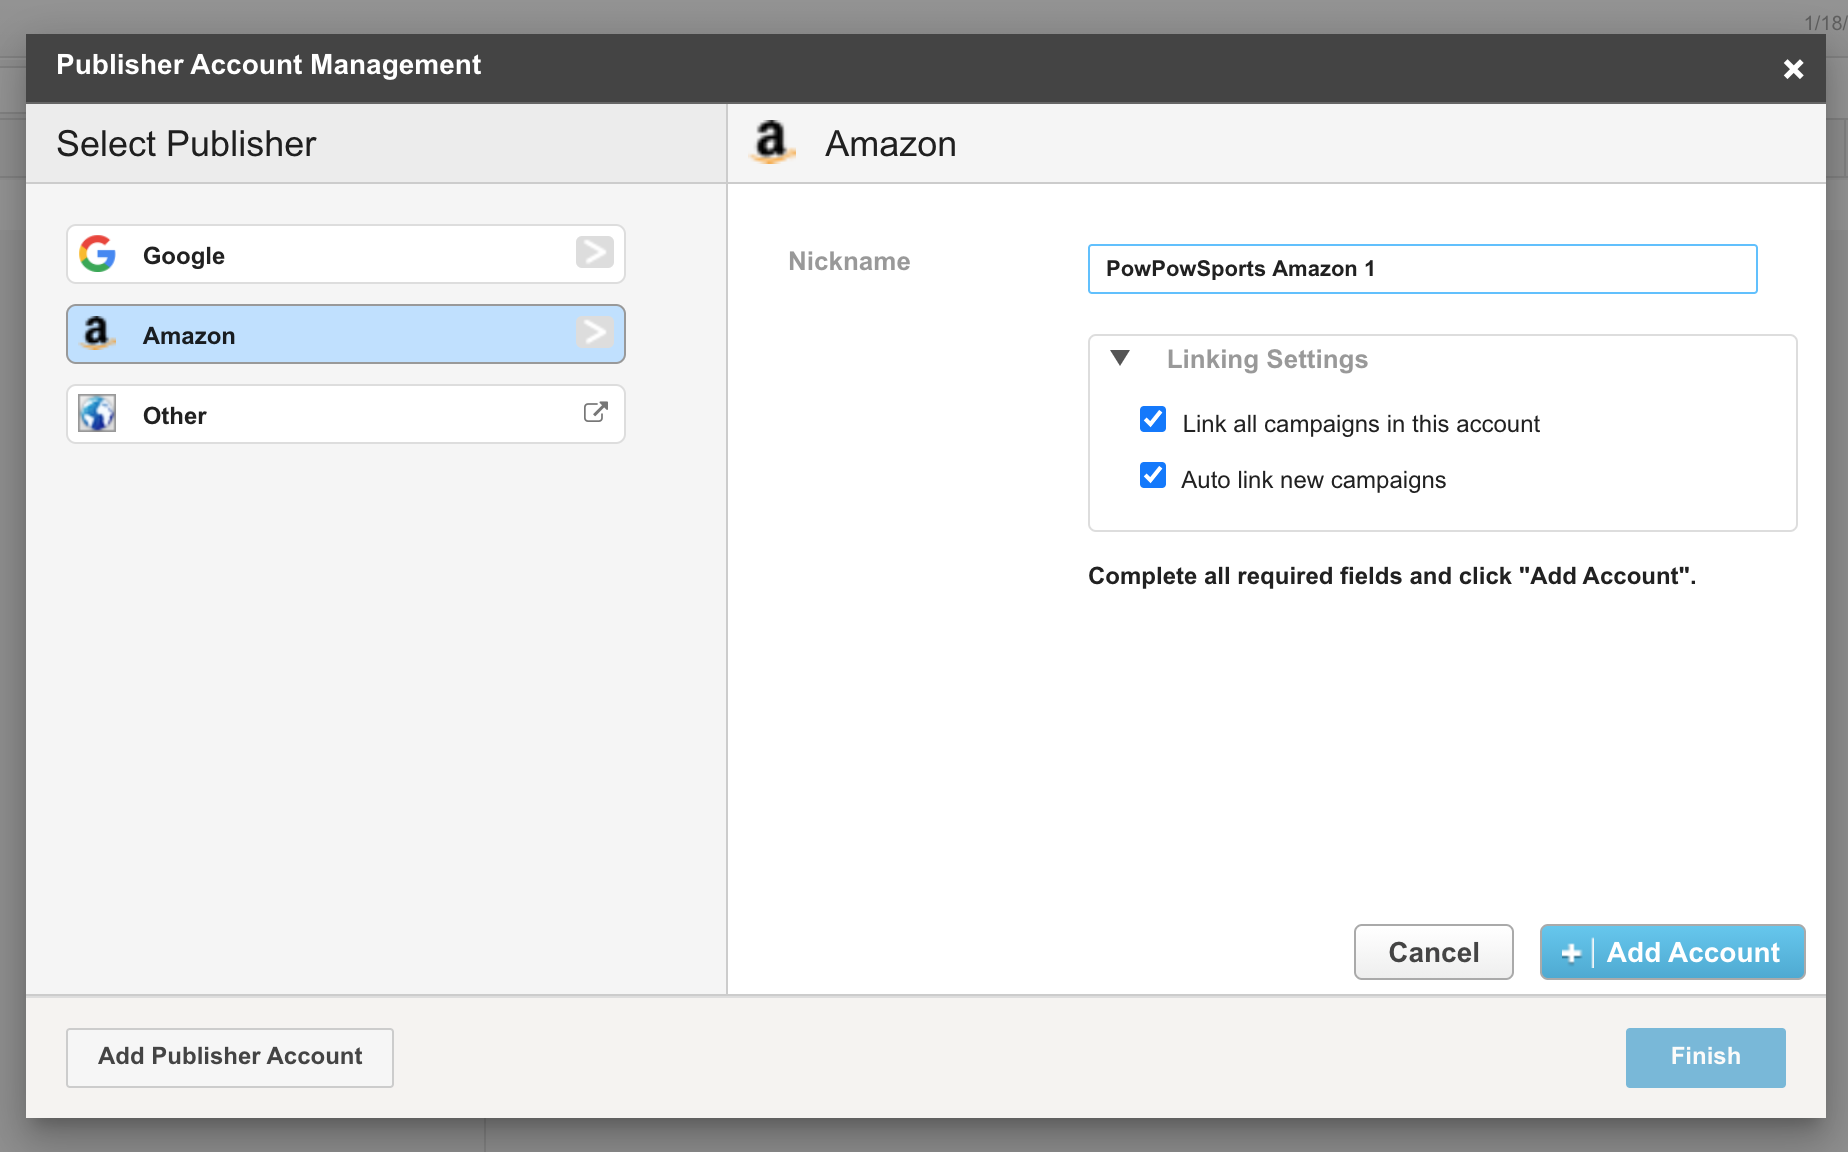
- Before you leave this screen, you can click Linking Settings to see a couple of advanced options.
- Checking Link all campaigns in this account will link all existing Sponsored Products, Sponsored Brands and Sponsored Display campaigns in your Amazon account.
- Checking Auto link new campaigns will automatically bring any future campaigns you create on the Amazon Advertising web platform into the Marin platform.
- Click +Add Account and you'll be taken to amazon.com to enter your Amazon Advertising credentials and complete the connection between Marin and Amazon. You may need to click the Allow button to continue if you are already logged in.
Note: If your credential has access to multiple Amazon Advertising accounts, all of these will be linked to Marin at the same time. - Once connected via your Amazon credentials, you'll be brought back to the Linking Wizard in Marin with your Amazon advertising account(s) now successfully linked.
- Note: If your Amazon credential has access to multiple Amazon advertising accounts, they will all now be linked in to Marin. The Nickname you provided would be applied to the first account (from the list of accounts provided by Amazon), with the remaining accounts having the following naming convention applied: Amazon Vendor/Seller - <countryCode> - <accountName>.
- If you chose to do so earlier, your campaigns will now be linked and begin populating the platform with data. If not, you can click your new Amazon account in the Linking Wizard, then go to the Campaigns sub-tab to start linking your campaigns manually.
You'll see a prefix for each of your Amazon campaigns depending on its type. SP for Sponsored Products, SB for Sponsored Brands, and SD for Sponsored Display. Don't worry, these prefixes only appear here for your reference.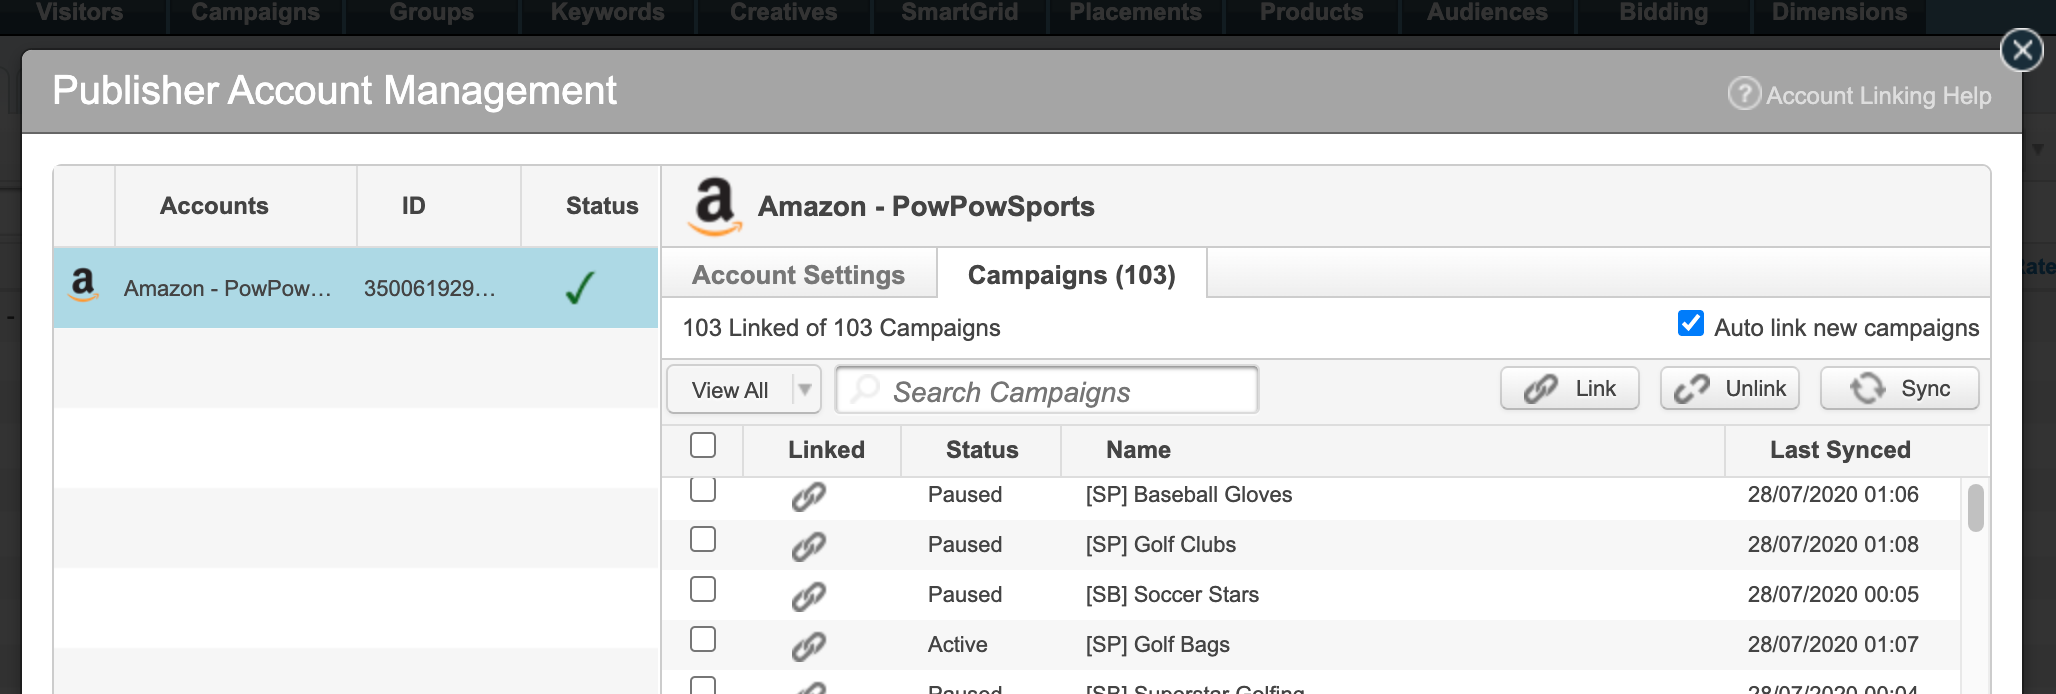
- Note: When multiple accounts get linked from this exercise (in cases when your credential has access to all of them), ensure that the nickname you wanted to provide got applied to the correct account, by checking the campaigns within that and the other accounts. If you require to change the name of any account, please work with your Marin representative.
- There are 2 more sub-tabs to give more information about Amazon account, which can be handy while creating new Sponsored Brands campaigns later on:
- 'Brands & Logos' - This shows Brand name, Brand Entity ID, Brand Logo, and Brand Logo Asset ID for each Amazon brand.
- 'Store Pages' - This shows Store name, Store page names and Store page URLs for each Amazon brand.
- Finally, click Finished within the Linking Wizard, to start using the grids.
Amazon Campaign Types
Now that your Amazon account is all linked in to MarinOne, you'll be able to manage your campaigns in the grids and in bulk.
To do this, you'll need to know which column headers are available for each Amazon campaign type. It is possible to bulk upload all three campaign types from the same bulksheet -- these do not need to be separate files.
We've created dedicated articles for each campaign type which explain the available options in more depth. Just click the relevant campaign type below to learn more about managing them with Marin.
