Introduction
To make managing your Grid view as streamlined as possible, simply follow the instructions listed in this Step-By-Step Guide.
Default Filters At Account Level
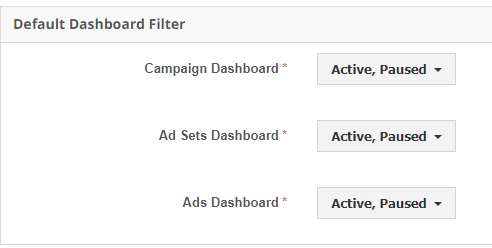
You can manage the default status display of the main dashboard and the default date ranges for your entire account via the Preferences Section.
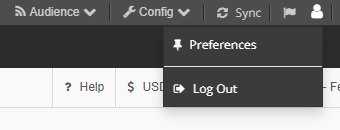
- In the top right-hand corner, click on the Person icon.
- Next, from the drop-down, select Preferences
- In the Default Dashboard Filter section, select the campaign, ad set, and/or ad status you would like to set as a default filter.
Default Filter Within A Media Plan
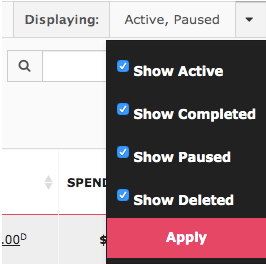
Within each Media Plan, you can set a default status filter for all levels: campaign, and set, and ad.
- Select a Media Plan.
- Click the arrow in the top-right corner of the dashboard, next to Displaying.
- Select any combination of active, completed, paused, and deleted campaigns to display, then click Apply.
Note:
- This feature can also be used to reduce the number of objects in your dashboard and speed up page load times.
- This setting will remain the way it was set until it is changed by you or another Marin user.
- It does not impact the Default Filters set at the account level.
Advanced Dashboard Filtering
Advanced Filters allow you to choose one or multiple filters based on metrics, status, or objective, and hide campaigns that do not correspond with your criteria.
- Select a Media Plan and navigate to the Grid where you'd like to apply a filter (Campaigns, Ad Sets, Ads).
- Above the Grid, select the Filter button.

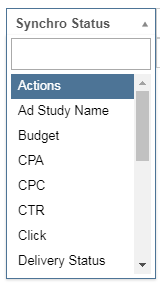
- From here, you can apply a variety of filters based on Synchro Status, Actions, Ad Studies, Metrics, and more.
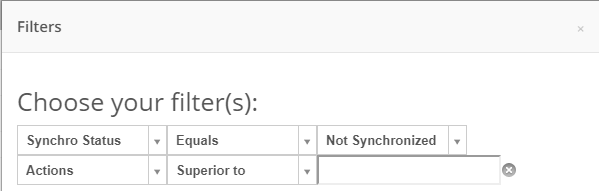
- In the first drop-down, you'll select the field where you'd like your filter to be applied.
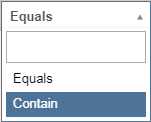
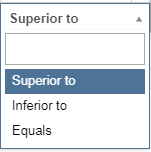
- In the second drop-down, you'll select the conditions for your filter. These options may vary depending on which field you're filtering. Here you'll see things like Equals, Superior to, Inferior to, and Contains.
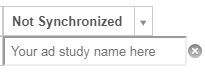
- In the third field (this is sometimes a drop-down, sometimes a text box) you'll have an opportunity to apply the specific filter needed for this field. For example, if you're filtering on Synchro Status, you'll see options for Synchronized, Not Synchronized, Resync needed, Refused, and Pending Review. If you're filtering on Ad Study Name, you'll see a text box where you can type in the exact name of your Ad Study or a word that your Ad Study name might contain.
- Use the plus sign icon to apply additional filters.
 If you're finished using a specific filter, you can click the X button to remove it.
To clear out all previously-used filters, click Reset.
- Once your filters have been established, click Select to apply them to your Grid.

- When your filters are in place, click Close to return to the Grid.

Note:
- A campaign can be paused OR active AND completed because these are two different types of status. This means that a campaign may appear when either the paused or completed filter has been applied.
- This filter does not persist across levels. Once you navigate to another level (Media Plan, Campaign, Ad Set, or Ad), the filter will be reset.
