You can use Ad Delivery options with Google to decide how quickly you'd like your ads to show. Having this kind of flexibility allows you to determine how you would like to pace the way your campaigns spend their daily budget.
Note: Google has sunset accelerated budget delivery for Search and Shopping campaigns.
Ad Delivery Options
Google allows you to determine how quickly you would like to spend your budget each day. Google Display offers the two options below.
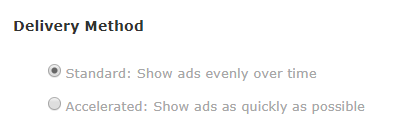
- Standard Delivery: this option aims to show your ads throughout the day, without spending your entire budget early in the day and causing your ad to shut off for the rest of the day.
- Accelerated Delivery: this option aims to show your ads as quickly as possible until your budget runs out. Once your daily budget has been reached, your ads may shut off for the day.
How To Edit Ad Delivery
Ad Delivery can be edited in two places within Marin -- from the Campaign Settings Page or directly from the Grid.
From The Campaign Settings Page
To make changes to your ad delivery options from the Campaign Settings Page, simply follow the steps below.
- Click on the main Campaigns tab.
- From here, click into the appropriate campaign where you would like to edit your ad delivery.
- Click on the Advanced Settings button.
- From here you can edit your Ad Delivery to either Standard or Accelerated mode using the corresponding radio buttons.
- Finally, click Save.
From The Grid
To make changes to your ad delivery options directly from the Grid, simply follow the steps below.
- Click on the main Campaigns tab.
- Select the checkboxes next to the campaign you'd like to edit.
Note: Ad Delivery can only be edited in single edit mode, not in multi-edit mode. So, for this step, you'll need to select one campaign at a time. - Click on the Edit ('pencil') button.
- From the drop-down, select Ad Delivery.
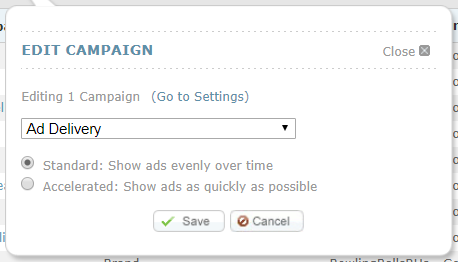
- From here you can edit your Ad Delivery to either Standard or Accelerated mode using the corresponding radio buttons.
- Finally, click Save.
