Introduction
The Page Post Ad ad type is only available within campaigns that have the following Facebook objective:
- Conversions
- Traffic
- Lead Generation
Step-By-Step
Creating Page Post Ads
To create a Page Post Ad in the platform:
- Navigate to the Campaign dashboard.
- Click on Add Ads icon.
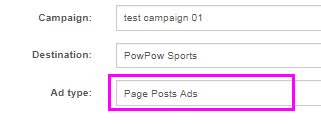
- From the Destination dropdown menu, select a Facebook page.
- In the Ad Type section, select Page Post Ads.
You can then promote an existing post or create a new one.
Creating Single New Posts
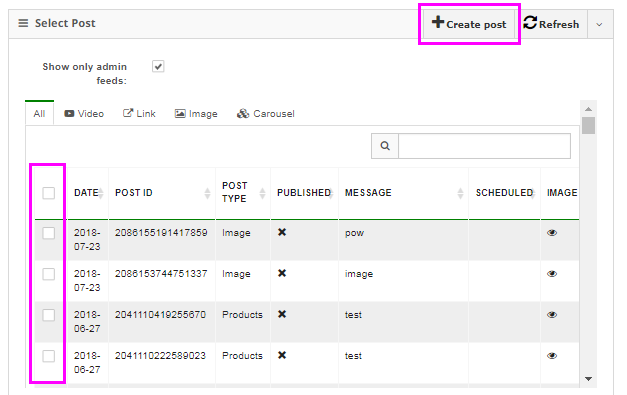
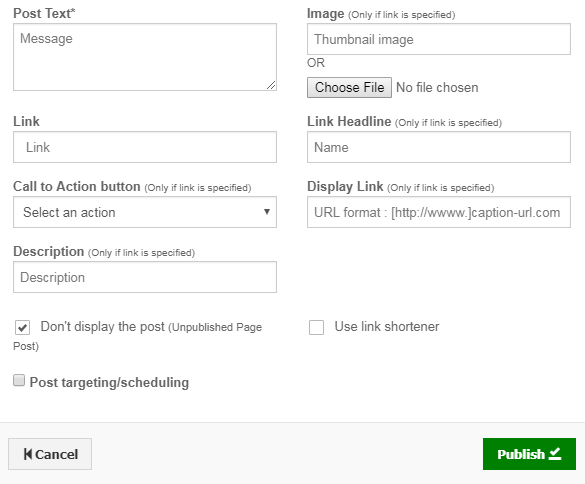
- To create a new post, select the ad and click the Create Post button.
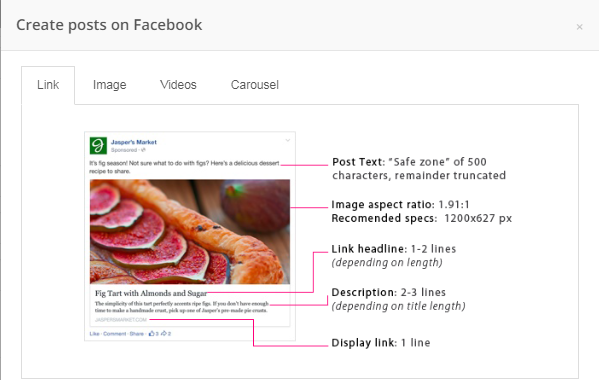
- In the pop-up window, select the type of Page Post Ad that you wish to create:
- Link: Classic Page Post Ad Format, ideal for generating clicks, leads and conversions.
- Image: Large, engaging image format is perfect for boosting brand awareness or promoting photo content.
- Videos: Generate video views and boost video content.
- Offers: Promote offers or discounts that users can use in-store/online
- The check-box for Don't display the post will create an Unpublished Page Post. This box is checked by default.
This is a 'dark' post that will not appear on your Facebook page. When unchecked, you will create an organic post, otherwise known as a Published Post. - The check-box for Post targeting/scheduling is a filter that allows you to select the language and country where your post will be displayed. This filter is on top of the published/unpublished filter.
- The check-box for Schedule this post means that your post will be unpublished until a specified time, at which time it will be published to your Facebook page.
- Fill in all fields and click on the Publish button to save your post.
You will see your post in the feed.
Note: If you do not see your post, try clicking on the Refresh button. Select the post(s) that you wish to use for your ads and click on “Generate Creatives” to preview ads in the “Creatives Preview” section.
Creating New Posts In Bulk
You can also use the bulk page post creator to quickly create multiple Page Post Link Ads.
- Select a Facebook page from the Destination dropdown menu.
- Select Bulk Page Post Creator in the Ad type section.
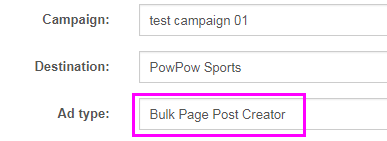
- Fill in the Ads section with the various elements of your ad.
Note: Make sure to click on thebutton to add your titles, bodies, URL, etc. You can enter multiple Titles, Bodies, CTAs etc for easy A/B testing. Click on the file icon to see material that has previously been used to create ads.
- Double click on the images in the file manager to select the creatives for your ads. Selected creatives will appear in the window below the file manager.
Note: Images that contain more than 20% text may not be approved by Facebook. - Click on the Generate Creatives button to preview your ads in the Creatives Preview section.
Best Practices
- Test multiple creatives to see what performs best.
- Keep content fresh, update your creatives every 1 to 2 weeks to ensure optimal campaign performance.
- Make sure your messaging is clear and concise.
