Introduction
Using Marin Social's Bulk Creator, you can set up multiple ads and ad sets with various iterations of ad copy and assets in just a few clicks, using a single workflow.
This feature will speed up the process of building ad iterations, especially on carousel ads and link ads. The Ad Type options will vary depending on the objective of your campaign.
The bulk ads creator can be used to build both Facebook and Twitter ad types within the same workflow. In this article, we'll show you how it's done.
Overview
In general, using the Bulk Creator consists of three main steps:
- Creative setup
- Add ad sets
- Bidding
We'll review each of these in more detail in the Step By Step section below.
Step By Step
First, head to the Campaign level and select the Add Ads button ('picture' icon) for the relevant campaign.

From here, we'll review each of the three setup phases in more detail.
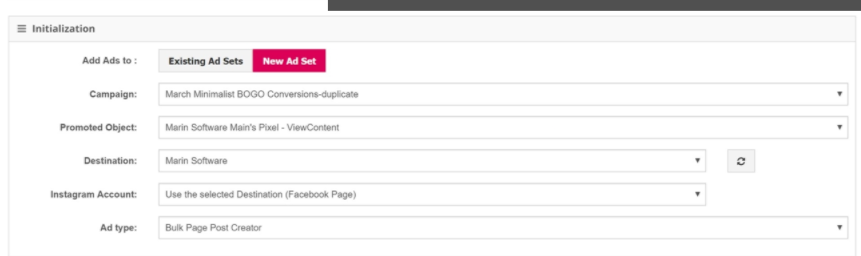
Creative Setup
Next, you'll start the Creative setup process.
- The campaign and promoted object will be pre-populated -- you'll only need to select whether you would like to add the new assets to existing ad sets or new ones. Additionally, you will need to complete the destination field, where you can choose the social page that will be associated with your new ads.
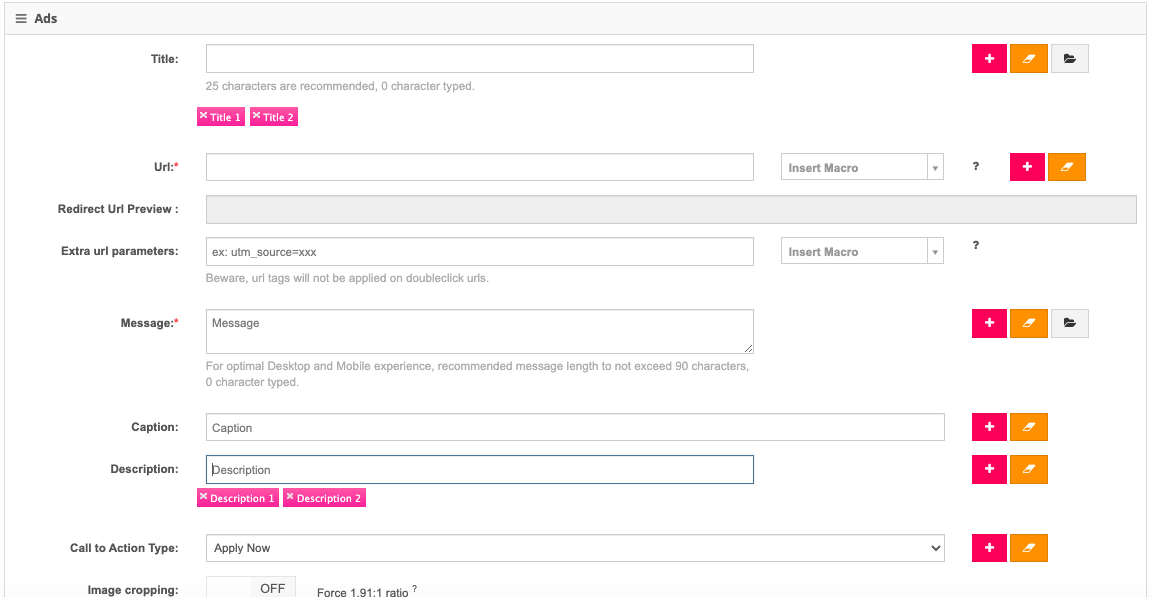
- Depending on the ad type, there will be different ad elements to customize, including some with multiple variations, such as Titles, Captions, CTAs, or URLs. Every variation will be added by clicking the + ('plus' icon).
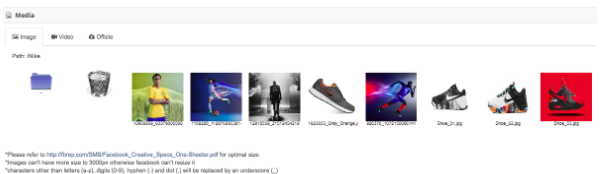
- When adding assets, you can choose from the static creatives or video assets within the media folder manager, upload new ones, or connect the image library to Google Drive and brows the available folders by accessing the Offline tab.
- Once all of the ad element variations are ready, click on the Generate creatives button.

- Marin Social will generate the preview of your ads based on every possible combination, given the ad elements provided. You have the option to keep these generated ad variations or remove any of them by clicking the Eraser button.
Add Ad Sets
From here, you'll begin to add your add sets.
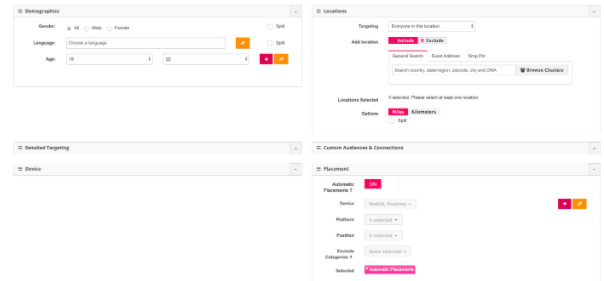
We'll focus on setting up the targeting options. This workflow differs from the publisher side, as it was designed to provide the advantages of visualizing creatives and ad sets on just one screen before sending them to campaigns. It was also designed to save time while creating ad sets with the corresponding ads.
The targeting options available on the publisher side are also available in the Marin Social platform; the audiences can not only be created on the fly, but saved audiences can also be populated.
Additionally, the following key features can be found:
- Use pre-saved location and interest clusters
- Include audience lookalikes up to 20%
- Use search intent custom audiences
- Ad set splitting - create multiple ad sets with all possible combinations of targeting variations that you can define.
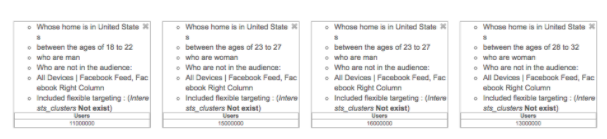
The variations of placement, demographic characteristics, devices, detailed targeting, or custom audiences can be added by clicking the + button ('plus' icon), following the same process by which the creatives were generated.
Once everything has been selected, click the Generate targeting button and the audience preview will be populated with the option to keep it as configured or edit it before the ads go live.

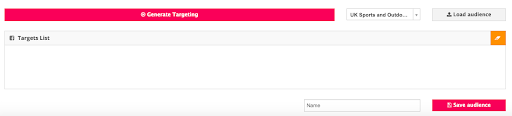
The ad set configuration can also be saved in order to utilize it in future campaign setups.
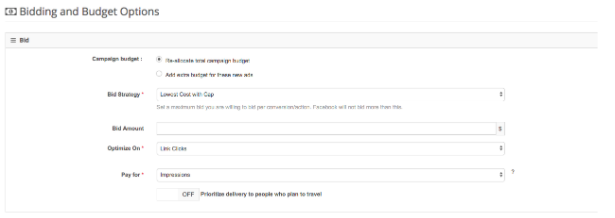
Bidding
Lastly you'll choose from the different types of bidding options available. Marin supports all bidding capabilities offered by publishers.
And that's all there is to it!
