Introduction
Facebook's Custom Audience pixel allows advertisers to track conversions, optimize for conversions, and build website custom audiences for remarketing purposes. Marin Social supports both the Facebook Custom Audiences Pixel and the ‘historic’ Facebook conversion pixel.
This article will cover how to use Marin Social to quickly and easily create the Custom Audience pixel, install it on your website, and create custom audiences based on the data it collects.
Step One: Create The Custom Audience Pixel
To create your Custom Audience pixel, follow these steps:
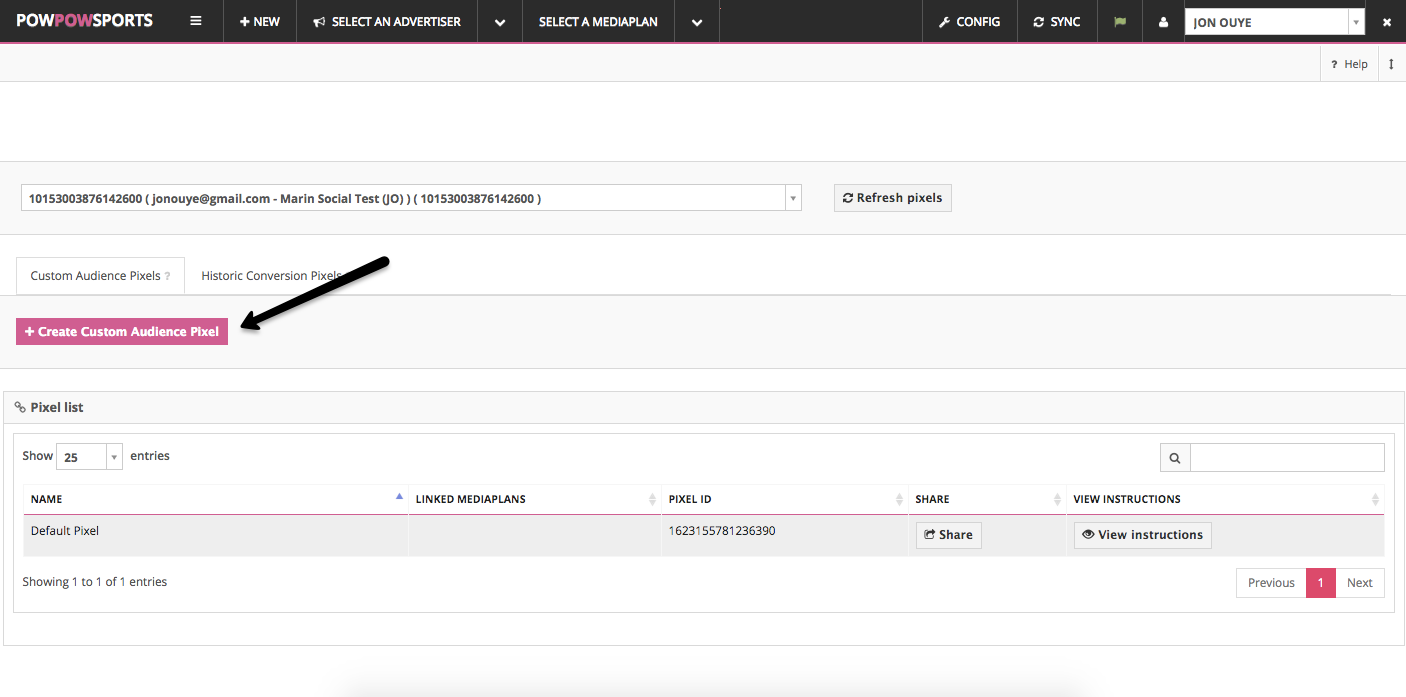
- First, create the pixel by clicking Config > Tracking.
- Then, click Create Custom Audiences Pixel.
- You'll then be taken to a screen where you will be asked to name your pixel. Once you've done that, you will have successfully created a Custom Audience pixel.
Note: You can create one Custom Audience pixel per Facebook ad account.
Step Two: Install The Pixel On Your Website
Follow these steps to install the pixel:
- On the same page, click View Instructions to view your new pixel's code.
- Select Native Tracking Code. This will pull in code directly from Facebook.
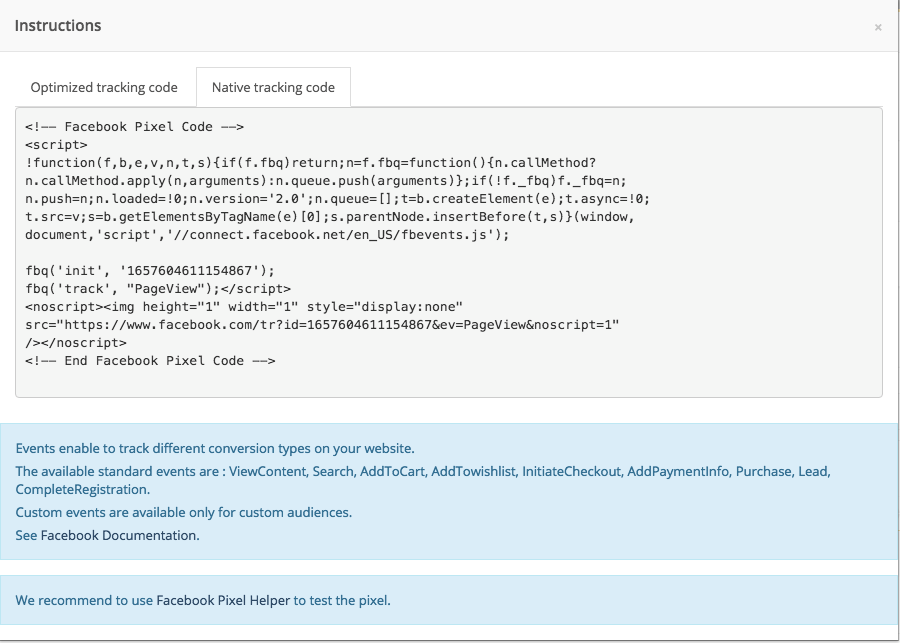
The code consists of two main elements: The base code and ‘standard event’ code.
<!-- Facebook Pixel Code -->
<script>
!function(f,b,e,v,n,t,s){if(f.fbq)return;n=f.fbq=function(){n.callMethod?
n.callMethod.apply(n,arguments):n.queue.push(arguments)};if(!f._fbq)f._fbq=n;
n.push=n;n.loaded=!0;n.version='2.0';n.queue=[];t=b.createElement(e);t.async=!0;
t.src=v;s=b.getElementsByTagName(e)[0];s.parentNode.insertBefore(t,s)}(window,
document,'script','//connect.facebook.net/en_US/fbevents.js');

fbq('init', '1234567890');
fbq('track', "PageView");
fbq('track', 'AddToCart');
</script>
<noscript><img height="1" width="1" style="display:none"
src="https://www.facebook.com/tr?id=16231...iew&noscript=1"
/></noscript>
<!-- End Facebook Pixel Code -->
You should place the base code on every page of your website between the <head> and </head> tags. Standard events such as ‘add to cart’ or ‘view content’ represent the actions users may take on your site, and should only be placed on the applicable pages.
You can also use custom events. If you use custom events in your tracking code, then use Create a Custom Conversion to be able to optimize and track for it.
Below is a list of the available standard events:
Website Action |
Standard Event Code |
Key Page View |
fbq('track', 'ViewContent'); |
Search |
fbq('track', 'Search'); |
Add to Cart |
fbq('track', 'AddToCart'); |
Add to Wishlist |
fbq('track', 'AddToWishlist'); |
Initiate Checkout |
fbq('track', 'InitiateCheckout'); |
Add Payment Info |
fbq('track', 'AddPaymentInfo'); |
Make Purchase |
fbq('track', 'Purchase', {value: '0.00', currency: 'USD'}); |
Lead |
fbq('track', 'Lead'); |
Complete Registration |
fbq('track', 'CompleteRegistration'); |
Creating Custom Audiences
Once you've installed your Custom Audience pixel on every page of your website, you can use Marin Social to create and remarket to custom audiences.
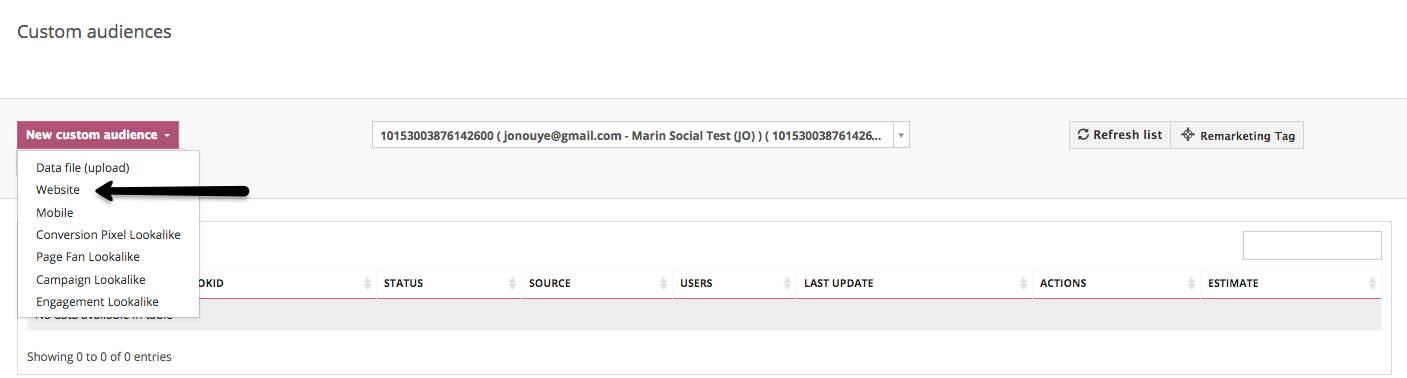
- Navigate to a Media Plan and click the Audiences tab. Click Custom Audiences to enter the wizard.
- Click New Custom Audience, then Website.
- Fill in the URL, path, or domain you'd like users in your audience to have visited. Give your audience a name, determine how many days you'd like a user to remain in the audience after visiting the page, and click Save.
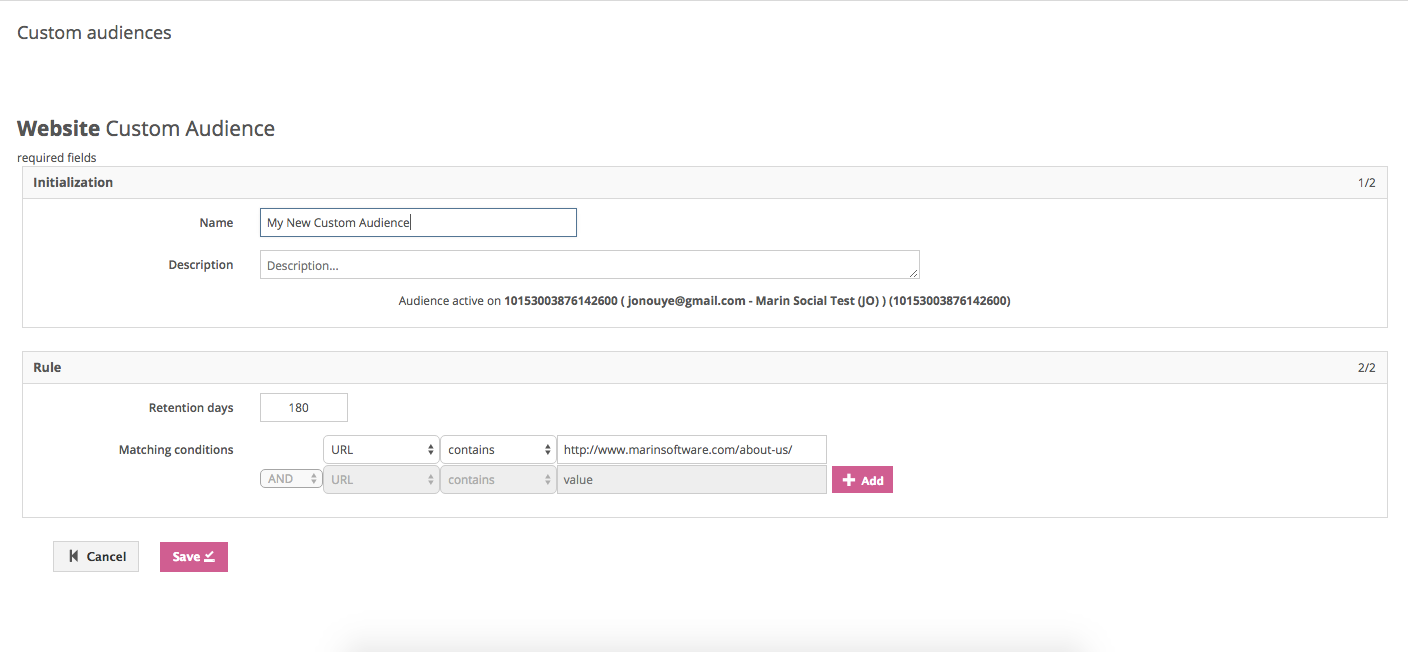
- All done! You've successfully created a custom audience based on data collected from your Custom Audience Pixel! Please note it can take a few hours to populate your new audience.
Important Notes
- If you were using Facebook's historic conversion pixel prior to installing the Custom Audience pixel, you can remove the old pixel code at this time. However, do not deactivate the pixel. You can report on conversions from both pixels in Marin Social by including both pixels on your dashboard. You can configure your dashboard at the Media Plan level.
