The Linking Wizard allows you to integrate your publisher accounts into the platform with just a few simple clicks so that you can start optimizing your campaigns faster than ever.
Follow the instructions here to link and edit your publisher accounts or link individual campaigns.
What Is Account Linking?
In order to use Marin to manage your campaigns, you'll first need to link your publisher accounts. These accounts can include Google, Microsoft, and more. Once linked, Marin will automatically sync changes to and from the publisher. This is especially handy if you have thousands of keywords to manage.
You can use the platform's Linking Wizard to add, remove, or edit accounts.
How To Use The Linking Wizard
Please note that currently, the Marin Linking Wizard supports Google, Microsoft, Amazon, Facebook (Meta), X Ads (fka Twitter), Yahoo! Japan, Baidu, Pinterest, Apple Search Ads, LinkedIn, TikTok, Snapchat, Qihoo 360, Criteo, and Taboola publisher accounts. We plan to support additional publishers in future releases. In the meantime, the Marin support team can assist in linking all other publisher accounts that are not included in this list.
Important Note: Instagram accounts are linked via the Facebook ad account they are connected to. To link Instagram accounts, please link your Facebook ad account to Marin.
Launching The Linking Wizard
-
Next, click on the Accounts drop-down and then the Publishers tab in the left-hand navigation.
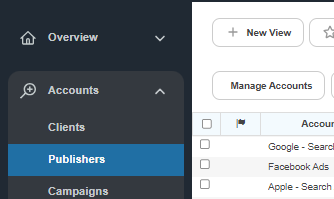
- For Google, Microsoft, Amazon or LinkedIn accounts, click Manage Accounts; for Facebook or Twitter accounts, click Social > Publishers > Manage Accounts.
To learn more about linking Amazon accounts, please check out our dedicated article.
Here you can link, unlink, and edit your publisher accounts or link or unlink individual Google campaigns. For Facebook and Twitter, it is only possible to link individual campaigns, rather than linking at the account level. We'll walk through each of these items individually throughout this article.
Adding A Publisher Account
To add a new Google account, follow the instructions listed below.
- Once you've launched the Linking Wizard, click the Add Publisher tab at the top of the Wizard.
- Click the "Link" button under the publisher you would like to link.
- You will be asked to log into Google Ads using your Google credentials.
- Marin will retrieve the list of Google Ads accounts that you have access to, either directly or via an MCC manager account.
- For Google and Microsoft publisher accounts, under Linking Settings, you will find the advanced settings associated with your account. We'll list all of the advanced settings in the next section of this article.
- When you are ready to link, click Connect Account.
Note: Make sure you are logging in with the Admin user of your publisher account.
Please note: If you receive an email asking you to verify that you are giving permission to production@marinmccaccess.com, you can complete the setup process by selecting Account access and then clicking Accept invitation.
To learn more about linking Amazon publisher accounts, click here.
Advanced Settings:
You will find the advanced settings associated with your account. We'll explain what each of these mean below.
-
Link all campaigns in this account
For convenience during the linking process, all campaigns in the account will be automatically queued to be linked. You can unlink specific campaigns on the next page or at any time following the initial account linking. The default value is True.
-
Auto-link new campaigns
New campaigns (that were created in the last two days) discovered during nightly sync will be linked automatically into the platform on a nightly basis. The default value is True.
-
Link and add accounts to the Marin MCC
Your account will be linked to the platform's MCC during the linking process. We highly recommend this, because it means higher customer service ticket efficiency and greater simplicity in managing your account. Once linked, you can easily unlink your account from the Marin MCC by logging into Google Ads and de-authorizing the Marin Software MCC from accessing your account(s). If your account is already managed by the Marin MCC, the selection here is not used. The default value here is True.
Important Notes:
- You must be logged into the correct Google Ads account before linking a Google Publisher Account in the Marin App.
- Note: We recommend logging out of your personal Google account before attempting to log into Google Ads.
- You will not need to grant Marin access from your Google Ads account, as you typically would when adding a new user. Marin will be granted Admin access to Google Ads and all necessary permissions are granted via the API during the linking process.
- Google MCC parent accounts cannot be linked at this time.
- We retrieve Google Ads Accounts that you have either direct email access to, or are one level deep in a manager account you have direct email access to. In the future, we may show accounts further down the manager hierarchy.
- We may show some Google Ads accounts that cannot be linked, such as those that have been cancelled, or those of which the setup is in progress. The Google Ads API does not allow to filter these out.
- Make sure that the username that you are authorizing has access to the account you are trying to link. If the username does not have access, the account linking will fail.
- If your credentials have changed, you will need to reverify using your new access credentials. To do so, follow the instructions in the Reverifying Publisher Accounts section of this article.
Note: If you plan on creating ads from any Marin platform, make sure you have Admin access to the publisher accounts and pages that you are about to link to Marin. Also, Make sure you have Admin access in Marin. If you don’t, you will not be allowed to link ad accounts
- Once you click to add a publisher account, you'll need to authorize Marin Software to access your account.
- From here, Marin will route you to Marin Social for further linking. Please consult our Adding a Facebook or Twitter Account article for further instructions.
- Once you've completed the above steps, simply reach out to Marin Support or your account representative to finish the linking process.
- Once your account is synced, check the List Objects in the Account Settings column to verify that all the required Facebook pages and Instagram accounts are linked too.
Important Notes
- If the Status column reads 'no funding source,' you should Contact your Facebook or Twitter account representative to reset your credit limit.
Editing Publisher Accounts
There are a number of elements of publisher accounts, some of which can be edited and some that cannot. If a field is editable, simply hover over it with your mouse until the Edit button ('pencil' icon) appears, click this icon, make the desired changes, and click Save.
Editable Fields:
-
Account Nickname
This is the name you will see in the platform for the specific publisher account you have added. This will default to the Customer ID if no nickname is added. Please note that the Account Nickname is platform specific and will not affect your publisher account. Feel free to change your nickname at any time.
-
Access
Use this field to adjust Marin's access to the publisher account. Choose between Write or Read-Only.
Non-Editable Fields:
-
Customer ID
The unique ID of your account
-
Authorization
-
An email address
This is the email address of the user who authenticated this account. -
Linked to Marin MCC
Shows that this account is linked to the Marin MCC and is managed with our own credentials.
-
An email address
-
Timezone
The time zone of the account
-
Currency
The currency of the account
Unlinking Publisher Accounts
Please bear in mind that once you have removed an account, all historic data will also be deleted and cannot be retrieved. Make sure you're 100% certain before you follow these steps.
- From within the linking wizard, select the Linked Accounts tab.
- Select one of your existing accounts then hit the “View” button.
- Click the Unlink Account button to remove the account and its relevant data. Please remember that once this is done, you cannot retrieve any historical cost or revenue data, so proceed with caution.
Reverifying Publisher Accounts
For Google accounts that are linked with OAuth, if the platform detects that it is unable to communicate with the publisher, it will mark the account as invalid or show a sync error. To re-authenticate and re-establish this connection, follow the instructions listed below.
- From the Linking Wizard, select the Linked Accounts tab and click on the publisher account that is experiencing sync errors.
- Select the Re-verify Account button in the bottom right. When clicked, you will be taken back through the process of re-authorizing the account. Follow the prompts to input the requested credentials and re-verify your publisher account.

Managing Campaigns
The Linking Wizard also allows you to manage your campaigns in a number of ways. Once you've selected a specific publisher account and hit the “view” button, navigate to the Campaigns tab to see a list of all campaigns that live in this specific publisher account. From here, you can link or unlink individual campaigns using the corresponding buttons above the grid.
Note: To sync individual campaigns, navigate to the primary Campaigns tab outside of the Linking Wizard.
Important Notes:
- Campaigns have linking statuses. You can hover over the linking status icons in the campaigns grid to get more information about this status.
- Filter campaigns by name by using the search bar above the list of campaigns. This search is non-case-sensitive and does not support boolean searches.
- You can take action on campaigns by clicking the check-box next to your desired campaigns and selecting one of the three action buttons above the grid - Link or Unlink.
- Campaigns that have been checked will be de-selected if the search value is changed or the pane sorted.
- Use Shift+click to select several consecutive campaigns. You can also select as many campaigns individually as you'd like.
- Campaign actions are reflected immediately in the Linking Wizard interface. Then, the Linking Wizard queues campaign actions as soon as you click out of the Campaigns tab, change the account you are managing, or close the Wizard by clicking the Finish button. In some cases, the apparent status may not change until the Wizard is re-launched.
Linking Campaigns
To link a campaign:
- From the Linking Wizard's Campaigns tab, select the campaign(s) you wish to link using the check-boxes next to the desired campaigns.
- Next click the Link button.
 This will queue the selected campaign(s) to be linked.
Note: Only unlinked campaigns can be linked. Campaigns in other states cannot be linked.
Unlinking Campaigns
To unlink a campaign:
- From the Linking Wizard's Campaigns tab, select the campaign(s) you wish to link using the check-boxes next to the desired campaigns.
- Next click the Unlink button.
 This will queue the selected campaign(s) to be unlinked.
Note: Linked, Syncing, and Invalid campaigns may be unlinked. Campaigns in other states cannot be unlinked.
Please note: When unlinking campaigns from Marin, you should always verify that the appropriate steps have been taken on the publisher side to discontinue conversion and revenue tracking of the unlinked campaigns within Marin.
Syncing Campaigns
Syncing individual campaigns can be done in the Linking Wizard or elsewhere in Marin. In the Linking Wizard, follow the same steps to link or unlink a campaign but select the Sync button. From the primary Campaigns tab, select the campaign you would like to sync, and click the Sync button.  This will queue the selected campaign(s) to be synced.
Note: All campaigns except for unlinked campaigns and campaigns linked to another platform account may be synced.
Within the Linking Wizard, on the Campaigns tab, you can also turn on or off the Auto-link new campaigns feature described in the How To Add A Publisher Account section above.
Closing The Linking Wizard
If your changes have been saved, there are three ways to close the Linking Wizard:
- Click the X in the top-right of the Linking Wizard.

- Click the Finish button in the bottom-right of the Linking Wizard.

- Or simply click off the Linking Wizard pane to return to the Publishers grid.
Remember that you can access the Linking Wizard at any time by simply returning to the Publishers tab, then clicking the Manage Accounts button.
