Marin Scripts allows you to leverage the power of Python for streamlined reporting, management, and optimization to boost performance and save time. Scripts can run across the wide range of publishers supported by Marin.
Using Marin Scripts, you can tag dimensions, change an object's status, set campaign budgets, set bids, and so much more!
Handy Tip!
Marin Scripts is currently being tested as a beta feature. If you would like to try Scripts, please reach out to a platform representative.
How Marin Scripts Work
Using a Python script, Marin Scripts leverage your recurring reports to identify changes that are needed; they then output a bulksheet that can be used to initiate those changes.
Creating a new script
- Navigate to Optimization in the left-hand navigation
- From there, click Scripts in the top navigation.
- Click the + ('plus sign' button) above the grid.
- Give your script a name. For example, you may want to name it after the automation you have planned. Then, click Create.
- From the Side Panel, please make sure you outline the intended automation goals in the Description section. This can be used by your colleagues to learn more about what the script does or provide some high-level information on how it works. It can also aid script code reviews performed by Marin.
- Scripts are based on recurring reports. Select your report from the Linked Reports drop-down. Please note that a report must have been generated at least once to appear in the drop-down list.
The only requirement for the Scripts report is that it provides enough information for a bulk output file. So for example, if you would like your bulk upload to be done at the ad group level, your report would need to contain Account, Campaign, and Ad Group columns.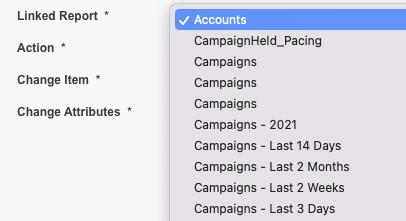
- The Action field allows you to generate your bulksheet. This can be generated as Bulk Upload, which creates off a bulk upload automatically in auto-checkout mode, or Bulk Upload (Preview), which generates a bulksheet for you to review prior to your upload. Starting in Bulk Upload (Preview) mode is highly recommended.

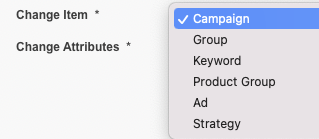
- The Change Item field will list the objects that can be changed by Marin Scripts, including campaigns, groups, keywords, product groups, ads, or Strategies. Select the object level you'd like to change from the list.
- The Change Attributes field has a list of columns that can be adjusted by Marin scripts. These will vary somewhat based on what object you selected in the Change Item field. This is the step where you can begin defining what your script will do. For example, do you want it to set a dimension? Adjust bids? Change an object's status? Get creative!
Please note that mandatory attributes are pre-selected and at least one non-mandatory attribute needs to be selected in order to proceed. Selected attributes are used to validate script output or flag missing or extra columns.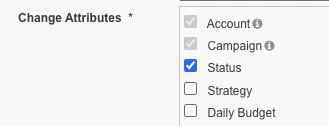
- Once you've defined your Change Item and your Change Attributes, click Provide Script. This will take you to the Script tab, where you can write your code.
Go ahead and click in the code area. The first time you click the code area, some code is automatically inserted for your convenience, including constants for column names and client time zone. Report column names may be difficult to work with since they are formatted with spaces, capitalization, and currency symbols. Please use the provided column name constants instead.
At this point, the inserted code should already be runnable via Preview, except the output would not be useful. Make modifications to apply your logic.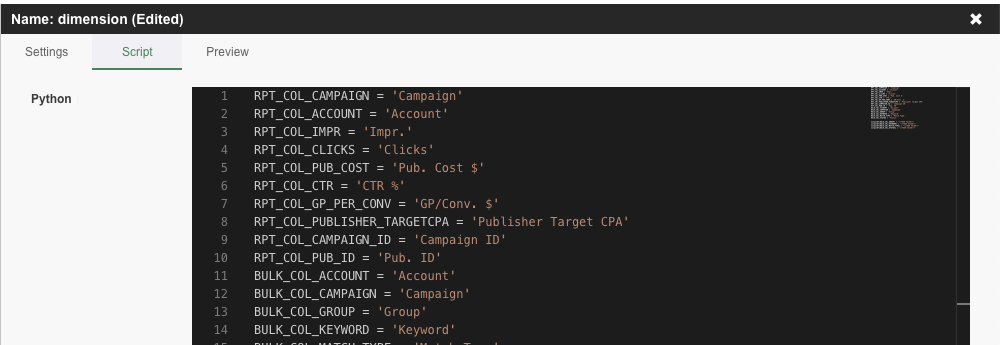
- You can then use the Preview tab to preview your script. Click the Run Preview button to generate your preview in the Results section. Debug output via print() can be viewed in the Logs section.
Getting Started
If you want to get started using Marin Scripts, please contact your platform representative to opt into the beta feature.
