Introduction
Facebook offers rich and granular targeting opportunities. Here you’ll find an overview of the various targeting options for your ads.
Certain targeting criteria have a Split feature that enables you to automatically split the different targeting options. For example, if you choose to 'split' a campaign based on gender, Marin Social will automatically create separate ads targeting males and females.
Demographics
Choose Gender, Language, Age and Relationship status options.
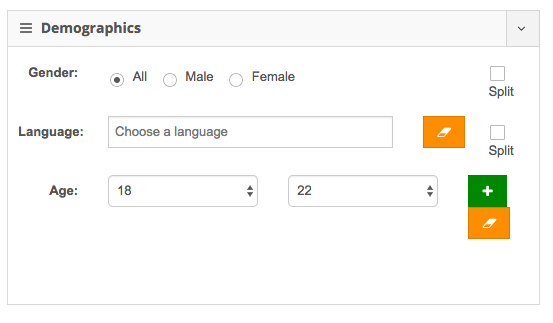
Check the Split Box to A/B test audiences. Marin Social will create 2 ad sets each time you tick this box.
In the More demographics section you will find other various Facebook targeting options including: Life events, Politics, Markets, Industries, Income, Net Worth, Home Type, Home Ownership, Home Value, Household Composition, Moms, Office Type, Family Status, Education Level, School, Majors, Work Employers, Work Position.
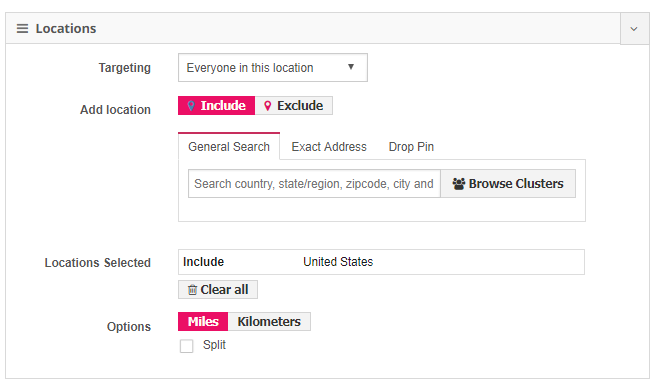
Locations
Choose the locations that you wish to include and exclude. Click on Select Location Clusters to use any location clusters you have created.
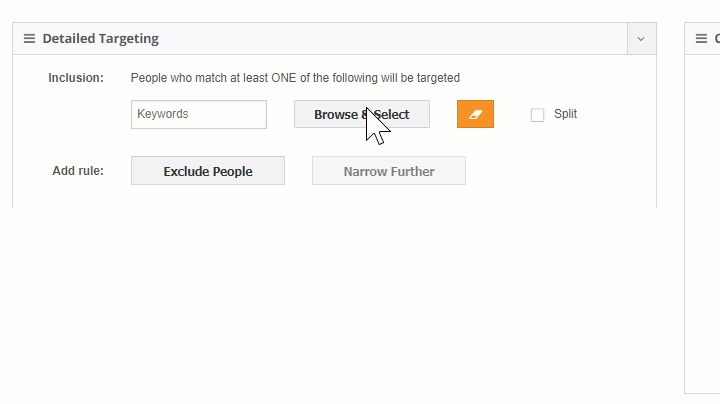
Detailed Targeting
Click on Browse & Select to include a behavior, an interest, a Partner Category or More Demographics.
Click on Exclude people to remove users from your targeting.
In the More demographics section you will find other various Facebook targeting options including: Life events, Politics, Markets, Industries, Income, Net Worth, Home Type, Home Ownership, Home Value, Household Composition, Moms, Office Type, Family Status, Education Level, School, Majors, Work Employers, Work Position.
In the advanced section you can also select Interest Clusters that you have pre-created via the Audience Tab.
You can also select Custom Audiences and Connections from here too.
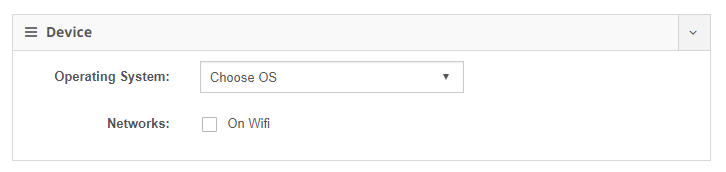
Device
For App Install campaigns, choose the Operation System and select 'On Wifi' in order to target only users that are connected to a wifi.
- platform: Choose OS, OS version and device(s).
- Networks: Target users on WiFi networks or mobile network connections.
Placement
Choose ad placement(s).
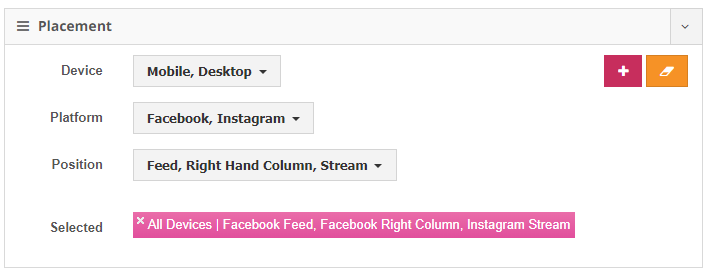
Make sure that your creatives are correctly formatted for the placement(s) you have chosen. By clicking on the 'plus' button, you're adding the combination of selected placements as a new target value for bulk creation. This will be displayed below the checkbox selections. This means that if, for example, you added two combinations, the platform will automatically create separate ads targeting the different combinations of placements. Note that all placements are selected as a target by default.
Note: If you have selected Website as your ad Destination, you will only be able to target Desktop Right Column. If you wish to target other placements, you will need to create ads and select a Facebook Page in the Destination dropdown menu.
Generate Targeting
Once you have selected all targeting criteria, click on Generate Targeting to see a list of your targets.
Save your audience to use for future ads by clicking on the Save Audience button. Next time you want to use this audience, simply select it from the drop-down menu and click on Load Audience.
Note: Once you press Generate Targeting, each box represents one ad set. It is very quick to create a multitude of ad sets but Best Practice is to have up to 8 ad sets within a campaign.
Best Practices
Use the Split Tick Box to create a A/B Test in 1 click.
Make sure to select Custom Audience and Connections either from the custom Audience & Connections section OR the Detailed Targeting section, but not both as it would throw a sync error message.
Save audiences that you will re-use in the future.
Create lookalike audiences from your top performing custom audiences to increase reach. For more information, please refer to Facebook Custom Audiences in Marin Social.
Once the targeting is generated, double check the Estimated Target Size and the Bid Guidelines in the targeting summary before choosing a bid.
