Introduction
The platform's grid is a great way to create customized views, but there may be times when you want to switch between these views quickly. That's where Saved Views come in handy.
Marin has been designed from the ground up to streamline your workflows. With this in mind, we've created the Saved Views feature to make it easier to use, more collaborative, and more intuitive than ever before. Marin's Saved Views feature allows you to create views for yourself or your whole account, then share them with colleagues in one click.
We'll walk you through how to create, share, edit, or delete your saved views.
What Is A Saved View?
If you've ever found yourself needing to re-apply your filters, columns, and other sorting options every time you want to view a certain sub-set of data, the Saved Views feature is for you. It allows you to set up the grid of any main tab to your precise criteria, then save that configuration and load it anytime you'd like. Not only that, but you can also share your saved views with colleagues via a handy URL.
Additionally, in Marin, Dashboards are created using Saved Views as building blocks, so if you plan to build out any Dashboards in the future, Saved Views will serve as your starting point.
Types Of Saved Views
In Marin, there are three types of saved views:
- My: Created and accessible to a single user.
- Shared (Customer): Created by a user and accessible to all users that have access to clients within the same customer. These views can be shared with other users and clients.
- Marin: Created and managed by Marin's internal teams, but accessible to all users.
Each view option also has its own tab within the Manage Views section of Marin, listing all created views by category.
Also, you may notice Saved Views that contain "(Migrated)" after their name. These indicate Marin Search Saved Views that have been migrated to Marin. You might see these in your Dimensions grid, among a few other locations in Marin.
Creating A Saved View
- First, log in to Marin and head to the main tab for which you'd like to create a saved view; for example, the Campaigns tab.
- From here, use the Column Selector, Calendar Selector, and filters to create the specific view that you'd like to save or share.
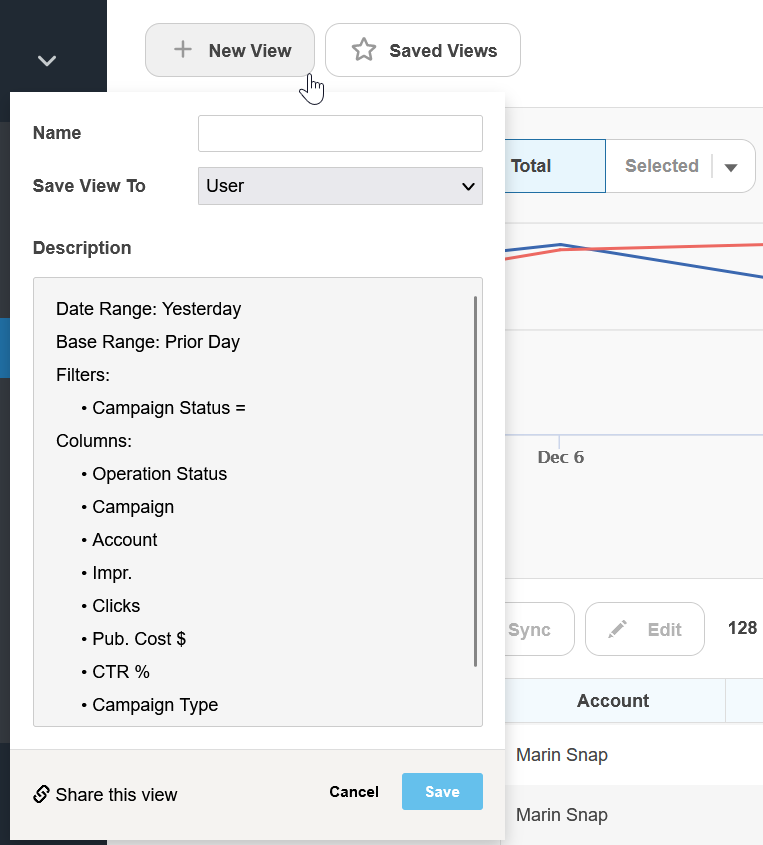
- Once your grid is set up to your liking for your saved view, click the + New View button above the grid.
- Click the Create New tab.
- Enter a Name and set access rights for this view. From the Save View To drop-down box, you can pick either User (just yourself) or Customer (all users who have access to this client). Note that if you choose the Customer option, any of your colleagues who also have access to this client will also be able to see and apply your saved view.
- In the Description box, you can double-check that all of the settings are correct, then click Save. Your new saved view will now be available to use as per the sharing settings you set up earlier.
- You're all set! See the next section for details about how to apply your saved view in the future, or use any of the saved views that have been shared with you.
Applying A Saved View
Once you have saved views that you've either created yourself or have been shared with you, you can quickly apply them to the relevant grid by following the steps below.
- First, head to the main grid to which the saved view applies -- for example, the Campaigns tab.
- In the upper-left corner of the grid, click the Saved Views button ('star' icon).
- The Saved Viewspane will appear and you'll be able to access any saved views to which you have access. You'll notice three tabs:
- My: Views created and accessible to a single user.
- Shared (Customer): Views created by a user and accessible to all users that have access to clients within the same customer. These views can be shared with other users and clients.
- Marin: Views created and managed by Marin's internal teams, but accessible to all users.
In the list of saved views, you can mouse-over any item for a preview of the view's settings. When you're ready to apply it to the grid, just click to highlight the view, then click Load at the bottom of the pane.
That's it! The grid will now be refreshed and, (like magic), your chosen saved view will be applied.
Sharing Your Saved Views
Collaboration is at the heart of the Saved Views feature, so you'll find it's easy to share the views you create with your colleagues. You can do this either by setting a view to be accessible to any users with access to a specific customer, or by copying a handy link and sharing it with others.
Below we'll outline how to do each of these.
Sharing A Saved View At Creation
When you're creating a saved view as outlined above, you'll be able to select either User or Customer via the Save View To drop-down box. To share your view with anyone who also has access to this client or customer, simply select the Customer option; once saved, your view will appear for those users in the Manage Views menu.
Sharing An Existing Saved View
You can share most previously-created saved views in just a few clicks. To do so, follow these steps:
- First, navigate to the relevant grid to which the view applies.
- Next, click Saved Views ('star' icon) in the upper-left corner. Locate the saved view you'd like to share.
Note: Saved views originally created in Marin Search and 'My Saved Views' cannot be shared, though there will be a sharing option shown and a link provided.
- Click on the view you'd like to share in the list, and you should see a 'link' icon on the right of the window. Click this button. Click the icon and either copy the generated URL or click the link icon in the pop up to copy the URL to your clipboard. You can now paste the link into an email or anywhere you need it. Note: The saved view will be applied to whichever customer you're currently viewing in Marin, so you can use it across all of your customers.
Dynamic Filters in Saved Views
In you want to limit a saved view to the account or campaigns that a specific user is responsible for, you can use Dynamic Filters.
Handy Tip
You can also find the Share this view link within the saved view creation window, so you can share your views right away before they're even saved. Talk about time-saving!
Deleting A Saved View
When you no longer need a specific saved view, you may want to remove it from the Saved Views list. Deleting any saved view is a piece of cake -- just follow these steps:
- Head to the relevant grid and click on the Saved Views ('star' icon) in the upper-right corner.
- Here you'll see the three different view options available to you, however,you will only be able to delete the views in the My or Shared tab. Mouse-over the saved view that you'd like to remove.
Important note: When deleting a Shared view you will also delete the view for your colleagues -- so be certain before you click that button!
- On the right of the saved view line item, you'll see a 'trash can' icon. Click it and you'll receive a confirmation message asking if you're sure you'd like to delete this view. From here... well, you can probably work that one out for yourself. Just be certain you're happy to say goodbye to your saved view before you continue!
Editing A Saved View
Editing a Saved View is now easier than ever! Simply follow the steps below to update your previously-saved views.
- Head to the relevant grid and click on the Saved Views ('star' icon) in the upper-right corner.
- Within the Saved Views overlay, simply select one of your previously-saved views and click Load.
- Once your Saved View has finished loading in the Grid, you can make any edits you need to make, such as adding or removing columns, adjusting your filters, or updating your date range.
- Then, you'll need to click on Saved Views ('star' icon) once more. Your newly-edited Saved View will show up in bold to indicate that it is the one that is currently loaded in the Grid.
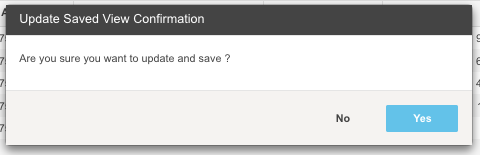
- From here, go ahead and click Update.
- You'll see a confirmation message asking if you're sure you would like to update and save. Click Yes to save your newly-updated view.
- If your Saved View has been added to a Dashboard, you'll see a Dashboard icon ('four blocks') next to your Saved View. If you hover over this icon, you can see links to the Dashboard(s) to which this Saved View has been added. If you click on the name of the associated Dashboard, that Dashboard will open up in a new tab in your browser.

- When you make edits to a Saved View that has been linked to a Dashboard, you will see the following message: "Editing the Saved View will also update the view on the linked Dashboard. Are you sure you want to update?" Simply click Yes to confirm and proceed.
Note: If you need to make one-time updates to your Saved View, you can do so from the Grid. Simply skip steps 4 through 8 and your previously-saved view will remain in-tact without saving your latest updates.
Saved Views In Marin (From Marin Search)
You can also migrate select Saved Views you've already created in the Marin Search platform. These will appear in the My view with a blue exclamation point.
Any changes you make to your Saved Views in Marin Search on the Channels, Campaigns, Groups, Keywords and Creatives grids are synced into Marin for some users.
Note: This sync is not bi-directional, so any views created in Marin will not appear in Marin Search.
To edit a migrated view, simply create a new Saved View by loading the view migrated from Marin Search, making your edits, then saving the view in Marin.
Important Information
- Note that Saved Views are not yet supported on the Dynamic Targets tab.
- Note that custom columns within a saved view will only be available to view in the account within which the view was created. This is because each conversion type/custom column has its own unique identifier that cannot be shared across accounts.
- Note that Dimensions within a saved view will only be available to view in the account within which the Dimension was created. This is true even if there is a Dimension by the same name being used in another Marin Client Account.
- Saved views can be accessed across multiple client accounts with the standard columns (i.e. Groups, Pub. Cost, Impressions, Conversions).
- When you delete a saved view, the saved view in the shared accounts will also be deleted and they cannot be recovered. In that case, you need to recreate the view. If you have an old report created from the saved view, it could be used as a guide to recreate the saved view.
- Currently Saved Views do not support 'and' and 'or' in the filters, and this could cause the saved view to be blank when selected. Please do not include these logic operators in the filter.
- Saved Views created in Marin Search on the Channels, Campaign, Group, Keywords and Creatives grids are available in Marin for some users. Any changes made to those Saved Views will sync into Marin’s My Saved View.
