Introduction
Pivot Tables are one of the most powerful features, allowing you to build granular reporting to your requirements.
Step-By-Step
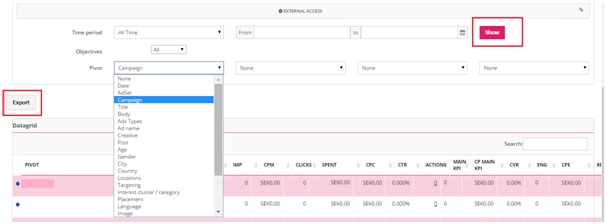
To create a pivot table report in the Marin Social platform, follow these steps:
- To begin, choose a Time Period.
- Determine your Pivot criteria. You can choose up to 4 criteria.
- Date: Campaign start date.
- Campaign: Campaign name.
- Title: Ad Title.
- Body: Ad Text.
- Ad types: Different ad types used.
- Creative: Image, body and redirection URL.
- Tweet: Promoted tweets, including tweet ID.
- Gender: Male / Female.
- City: Cities targeted.
- Country: Countries targeted.
- Location: Full location targeting – country, city, zip code, etc.
- Targeting: Different targeting segments created.
- Interest cluster / Category: Interest clusters and Twitter interest categories.
- Placement: Timeline / search / timeline and search placement.
- Language: Targeted language(s).
- Media Plan(s): Media Plan.
- Mobile device family: Device.
- Mobile device OS: Device operating system (OS).
- URL: Destination URL.
- Click Show.
- To sort a postponement, click on a table field.
- To export the postponement data to Excel, click Export.
-
Notethe relevance of the Selection Criteria order: eg Gender, Date will display a different table than Date, Gender.
-
Notethe relevance of the Selection Criteria order: eg Gender, Date will display a different table than Date, Gender.
External Access
The platform allows you to share the generated carry with your client or manager. To share a link with an external user:
- Select the language you want the postponement external access to appear in.
- Choose the Time Period of the deferral.
- Click Share.
- Click on the button to open the below-carry in a new tab.

