A client Account (sometimes referred to as a Marin Client Account) is our name for your main Marin Account.
If you need to create a new client account you'll follow the instructions listed here. Note that this process has changed for our Social users, as previously this was done via a new Advertiser in the Marin Social platform. It is now our best practice that new Marin Client Accounts, including Social, be created in Marin.
Please note that in order to create a client account, you will need to have a user login with Admin access. If you do not have a login with Admin access, we recommend working with other members of your team to add additional client accounts. If you'd like to learn more about user permissions, we recommend checking out our Managing Passwords and Users article.
Handy Tip
Please note: User management and creation should be done in Marin only, not in Marin Search.
How To Create A New Client Account
Note: Only users with Admin level permissions are able to create or edit client accounts in the platform. If you are an Admin, you can give yourself Write access after creating the new client account.
- The first step, as always, is to log into Marin.
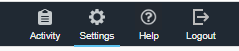
- Next, click on the Settings button ('gear' icon) in the top right-hand corner.
- From here, you'll click into the Clients & Users tab.
- Next, you'll click on the Clients sub-tab.
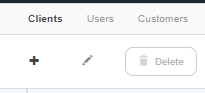
- Then, you'll click on the Create button ('plus sign' + icon).
- The next step is to enter a Name for your new account. Be sure it's something memorable or, if your company uses specific naming conventions for your client accounts, make sure you follow those here.
- From there, you'll assign the correct Locale for your client account. This is a combination of language and country, for example en_US corresponds to English + The United States, or en_GB corresponds to English + Great Britain. This setting will control the display certain items within the interface, such as date formatting (MM/DD/YY or DD/MM/YY) or number formatting (1.23 or 1,23).
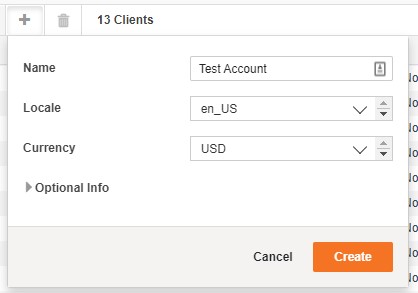
- Next, you'll assign the specific currency that should be used for your client account, such as USD, GBP, or EUR.
Note: This setting is NOT editable once the client account has been created, so make your selection carefully.
- Under, Optional Info, you can assign additional details such as Primary Contact, Job Title, Phone Number, and Email Address, as well as specific notes. All of these fields are optional.
- When all of the required fields have been filled in, click Create to proceed.
- Once created, your new client account will appear in the grid on this page as well as in the Client Selector drop-down. You'll still need to assign user access, which we'll talk about in the next section.
Please note that prior to assigning user access, other users will not yet be able to access this new client account.
How To Assign User Access
Once a new client account has been created, the next step is to assign user access.
- From the Clients sub-tab (in the Settings section), double click on the client account where you would like to assign user access. This will launch the Side Panel.
- Next, navigate to the User Privileges tab within the Side Panel.
- Here you will see all of the available users that exist within this customer. You can select the users who should have access to this client account by clicking the check-box next to each user.
- You will then click the Change Access button.
- From here, you can select from: No Access, Read Only, or Write access. These align with the access levels listed in our user creation article here.
If you need to grant different access levels to different users, simply repeat this process as needed to grant the necessary access. You can group users together in this process that will have the same access level.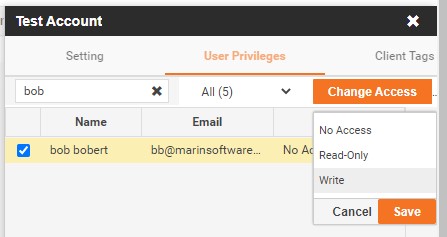
- Once you've selected the access level you'd like to assign, click Save. Now your colleagues will have access to this client account from the Client Selector drop-down.
How To Edit A Client Account
Once a new client account has been created, it can be edited very simply.
- From the Clients sub-tab (in the Settings section), double click on the client account where you would like to assign user access. This will launch the Side Panel.
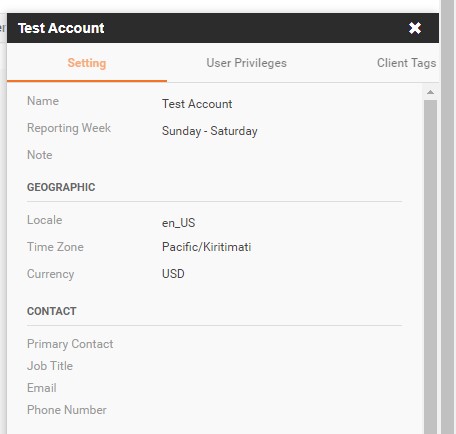
- From the Settings tab, you will see a list of all available settings. The editable settings will have show an Edit button ('pencil' icon) when you hover over the field. To edit a field, click on this icon.

- Once your changes have been made, click Save. We'll talk a bit more about the editable fields in the Configurable Settings and Non-Configurable Settings sections below.
Configurable Settings
The following information applies to both the Clients Side Panel in Marin.
The following settings are editable:
- Client Name
- Locale: This is a combination of language and country, for example en_US corresponds to English + The United States, or en_GB corresponds to English + Great Britain. This setting will control the display certain items within the interface, such as date formatting (MM/DD/YY or DD/MM/YY) or number formatting (1.23 or 1,23).
- Notes
- Reporting Week: This establishes whether your week should run Sunday to Saturday, Monday - Sunday, or some other variation.
-
Logo: From here, you can upload a 30x30 pixel logo. Once added, a larger preview will be displayed here and the top-left M icon will be replaced with your preferred logo for all clients within this customer. Note that this is a customer-level change, not a client-level change, so this will impact all client accounts within this customer.

Non-Configurable Settings
The following information applies to the Clients Side Panel in Marin.
You can view these settings (but they are not editable):
-
Timezone: For the client account time zone settings, the application automatically downloads the time zone set at the publishers for each account and uses the westernmost time zone of all publisher accounts linked in to this client account.
The time zone of the client account controls when bidding is kicked off. For example, if a client account has publishers in Eastern Standard Time (EST) and Pacific Standard Time (PST) time zones linked in, bidding will start at 5pm PST (since PST is west of EST). This ensures that all cost & conversion data from the prior day have been downloaded before bidding begins. More information about time zone settings can be found in this help center article.
- Currency: This controls the currency which displays reports and analytics. This currency does not need to be the same as the currency used at the publisher accounts. The application automatically fetches currency spot rates and also allows users to upload their own currency conversion rates. For more information, see Currency Support.
How To Set Up Multi-Client Accounts
Search marketers with multiple clients or lines of business can run those as separate client accounts, accessible via a single log in. This feature is most useful for agencies, but may also be valuable to anyone who runs multiple, distinct lines of business. User permissions are set for each client account by an Admin user. A given user can have access to one or more client accounts.
Selecting a new client account from the Client Selector drop-down loads the new data into the grid and everything presented in the application will be associated with that new client account.
Client account settings are viewed on the Clients tab in the Admin section of Marin. Here you can create a new client account and set the access level for each user.
