Introduction
The platform allows you to report on cost and revenue metrics at the sitelink level. This helps you optimize your ad spend by allowing you to see which sitelinks drive the most clicks and conversions.
In this article, we'll walk you through how to enable conversion and revenue tracking at the sitelink level using the Sitelink ID (or SL ID).
Note: To enable sitelink conversion and revenue reporting for your account, please contact your platform representative.
Where To Find This Feature
Once your platform representative has enabled sitelink-level reporting for your account, you'll find a new Ad Extensions sub-tab under Accounts > Ads. To get this grid populating with sitelink-level conversion and revenue data, follow the instructions listed in the Step-By-Step section below.
Step-By-Step
Follow the instructions below to set up your sitelink-level conversion tracking.
URL Builder
- Next, we’ll update the URL Builder. In the top-right, click on Settings > Revenue & Tracking.
- Within the URL Builder, you will see the URL Templates associated with the publisher of your choice. We’ll use Google in this example.
Note: If your URL Builder has not been set up previously and there are no URL Templates, please reach out to your Marin account representative for next steps.
- Click on the Custom Parameters sub-tab. Then, click on the + Symbol
- The name of your new parameter will be "slid". Be certain you’re setting your customer parameter at the sitelink level and populating it with [uniq_id] value (this can be found under the Marin Macros drop-down). Select Google as the Publisher.
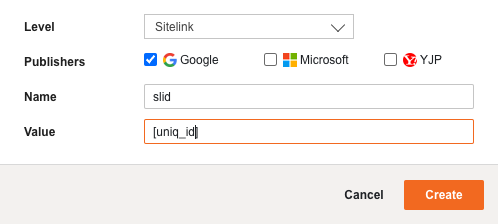
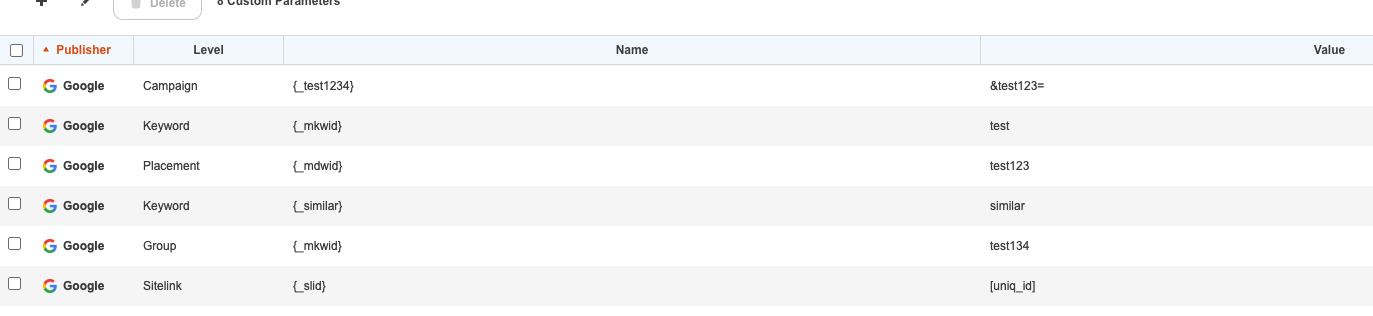
- Click Create to save your new custom parameter. You should now see your new custom parameter listed under your Custom Parameters sub-tab.
- Next, you can add your new SL ID parameter to your tracking template.

Your precise SL ID setup within your Tracking Template may take different forms depending upon your integration type. We’ve included a few examples of this below.
Example 1
A URL without the SL ID parameter:
http://example.com/?mkwid=abcd1234&pcrid={creative}
URL with the SL ID parameter:
http://example.com/?mkwid=abcd1234&p...}&slid={_slid}
Example 2
URL without the SL ID parameter:
http://example.com/?utm_content=abcd...id|{creative}|
URL with the SL ID parameter:
http://example.com/?utm_content=abcd...|slid|{_slid}|
Note: If you’re uncertain how this parameter should look for your integration type, reach out to your Marin account representative.
Tracking IDs
- Now, navigate to the Tracking IDs section.
- If your Marin Client Account has already been set up to track revenue to the sitelink level, the Tracking ID tab will show this.

Note: If you do not see this section in your account, please reach out to your Marin account representative.
- Next, you’ll want to fill in the Parameter Name, Value Separator, and Stop Character fields. The parameter name is "slid", but the specific value separator and stop character you will use is based upon your URL structure and your integration type. When you’re ready, click Apply.

This step will trigger Marin to do a full re-parse of your account, so if you have a large number of objects in your account, this can take a number of hours to complete. We recommend completing this step toward the end of the workday or before heading into the weekend.
Note: If you’re uncertain which value separator or stop character to use, please reach out to your Marin account representative to discuss the best options for your account.
Applying Your Changes
- To apply your new URL tracking template changes, navigate to Accounts > Publishers. Select the checkboxes next to the relevant publisher accounts where you wish to apply your account-level tracking template.
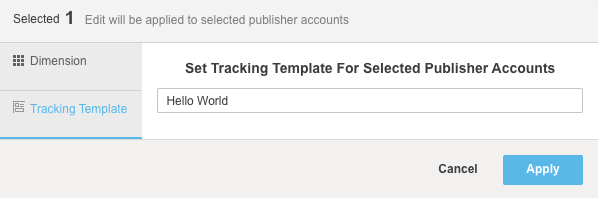
- Next, click the Edit button and select Account Tracking Template from the drop-down.
- From here, you can type anything you’d like into the blank text box. For example, you could type “Hello World” and the resulting job would tell the URL Builder to run under the correct template. Then, click Apply.
- To check the status of this process, click on the Activity Log from the top right-hand corner of the platform, find and select the corresponding activity, and post the Tracking Template to the publisher.
Additional Steps
- Next, you will need to bulk upload your sitelinks with an empty custom parameters column in order to apply the {_slid} custom parameter. To learn more about exporting and bulk uploading sitelinks, check out our article on Managing Sitelinks via Bulk Upload.
- Some integration types require an additional back-end update in order to successfully track at the sitelink level. This update may take place on Marin’s end or it may require updates to your revenue file before it is sent to Marin. If the latter is true, this may require assistance from your development team.
To find out if your integration type needs additional updates, we recommend reaching out to your Marin account representative to talk through the steps you’ve already completed. From here, they can recommend additional updates.
- Lastly, it’s recommended that you QA your new sitelink-level data as it starts to come in. You can review your new sitelink-level data from Ads > Ad Extensions sub-tab.
Current Limitations
- At this time, we attribute cost and revenue to the sitelink object. The platform does not report on all campaigns and groups with which the sitelink is associated nor does it separate out the data by campaign/group.
- The platform does not report on sitelink metrics by device at the current time.
- In the revenue upload file, if a row does not have a creative ID, the platform will drop that row and won’t attribute a conversion to either the sitelink or creative.
- Please note that the platform reports on sitelink cost metrics incurred on the extension itself and our numbers do not include impressions and clicks on other extensions when a certain extension was present. To match up against Google Ads, segment by This extension vs. Other and look at This extension numbers.
