Both MarinOne and Marin Social allow you to automate your daily ad optimization tasks using Social Rules, a feature that allows you to:
- Save time
- Achieve better ad performance and lower CPAs
- Boost performance of high-performing Ad Sets and Ads
- Automatically pause underperforming Campaigns, Ad Sets or Ads
- Systematically adjust bids to ensure your ads are reaching your CPA goals
- Control frequency of your ads to prevent ad fatigue
What Are Social Rules?
Rules allow you to input specific criteria that can execute actions to your ads based on number of clicks, time, or amount of money spent.
Important Notes
Though Social Rules exist in both MarinOne and Marin Social and are the same basic concept, these are considered two different features and cannot be used in tandem. This means that Rules created in MarinOne cannot be applied to campaigns or media plans in Marin Social and vice versa.
You will not be able to create Social Rules in both MarinOne and Marin Social -- you can use them in either platform, but not in both.
Tips For Using Social Rules
- You can use Custom Columns in your rule to create a fully customized optimization rule that matches your business KPIs.
- Social Rules can be combined with reporting that uses Dimensions. Rules can update your Dimensions to give you full reporting visibility on ads that were boosted or paused by rules.
- You can set up an email Alert that notifies you when a rule has been triggered.
- You can combine rules that update Dimensions with MarinOne Alerts to receive email notifications with a complete list of ads that have been changed by a specific rule.
Using Social Rules In Marin
Creating Rules
You set up rules by following the steps below:
- Navigate to the Social > Rules in the left navigation. Here, you can see a list of all rules that have been created in your MarinOne Client Account.
- Click on the Create button ('+' Plus sign icon).
-
Give your rule a name. We recommend using naming conventions that will make it easy to identify later on.
- The Apply Rule To field controls the level for Criteria & Action. You can apply your rule to Campaigns, Ad Sets & Ads. For example, if you select Apply Rule to Active Campaigns and select Cost per Main KPI in the Criteria section, we will compare campaign level cost per KPI to check if it matches the condition.
Note: Campaign & Ad Set level performance based criteria will account only for active ads. This is to avoid making optimization changes based on the performance of paused objects.
-
Action Frequency Cap allows you to configure the frequency at which the actions from your rule will be applied. You can enter a value, then use the Type drop-down to define your value. For example, you may choose to apply your rule after every 100 clicks, 24 hours, 7 days or $1000 spent, just to name a few possibilities.
Example: Rules run multiple times a day, typically every 30 minutes. This setting can control the frequency of your rules. For example, you can set up a rule stating that if today's CP Main KPI is greater than $100, then decrease the bid by 10%. However, for some rules you may not want them to be applied too often. In this case, setting your rule to apply every $100 will ensure the ad has spent at least another $100 before the bid is changed.
Performance metrics such as Main KPI and CP Main KPI are based on your KPIs selected in the Media Plan settings, which can be found in Marin Social. ROI is based on our Main KPI revenue data using the formula (KPI Revenue - Pub. Cost)/Pub. cost.
- Next, you'll begin inputting your Criteria.
You can toggle between Match All or Match Any. Match All will fire your rule only when all criteria has been met. Match Any will fire your rule when any of the conditions are met.
- Next, you will configure your rule using a wide variety of conditions.
The first drop-down allows you to select between a Dimension, Performance, Custom Columns or object Settings.
You'll then input any conditions that are right for your campaigns. For example, you may choose to set a rule for when performance drops below 100 clicks or a rule based on your own custom Dimensions. The choice is really up to you!
Note: nested custom columns are not supported. Rules will not work as expected if your custom column is using another custom column in its definition.
- Next, you will determine the actions that will be taken when the conditions are met. You can choose to adjust bids by a value or a percentage, email a certain set of stakeholders to alert them that an action was taken, apply a specific Dimension, or adjust the object's Status (Active, Paused, etc.).
You can even choose multiple actions, so if you'd like your bid to decrease AND have MarinOne send you an email, you can!
Adjusting Ad Bids action is available only for campaigns that use manual bidding and Ad Set level budgets. If your campaigns are using Facebook Campaign Budget Optimization, use update Ad Set Bid action to manage your bidding.
Note: Email alerts currently only inform stakeholders than a rule was applied and an action was taken, such as a bid change or pausing an ad. For more in-depth, performance-based email alerts, we recommend using the Alerts feature.
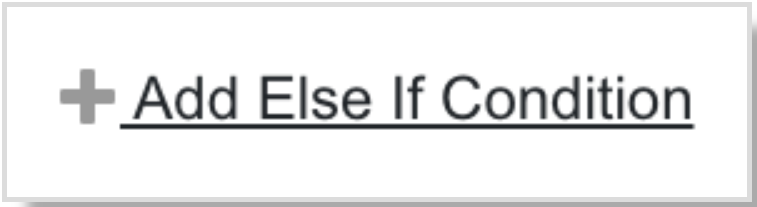
- If you would like to apply more conditions, select Add Else If Condition. You'll then repeat steps 8 through 10 as needed for all of your additional criteria.
- Then, you'll apply your rule to your campaigns. Simply select a campaign from the drop-down or begin typing a campaign name into the box to search for a specific campaign. Select as many campaigns as you'd like to meet your business needs.
Note: You can apply multiple rules to the same campaign and all of them will be executed. For example, you can create one rule that controls your ad set bid, the other to pause underperforming ads.
- Lastly, click Apply. That's all there is to it! You can now use rules to manage your social campaigns.
Editing Rules
- Navigate to the Social > Rules in the left navigation. Here, you can see a list of all rules that have been created in your MarinOne Client Account.
- Select the check-box next to the rule you'd like to edit, then click the Edit button ('pencil' icon).
- You can update any of the elements are criteria of a rule, following the guidelines outlined in Creating Rules section of this article. Note that you will not be able to edit Apply Rule To field. To change the level of the rule, duplicate your rule or recreate your rule with the new level as outlined in the Creating Rules.
Note: You will not be able to edit the Apply Rule To field. To change the level of a rule, duplicate your rule or recreate it with the new level, as outlined in the Creating Rules section of this article. - When all of your updates have been made, click Apply to save your changes.
Duplicating/Copying Rules
- Navigate to the Social > Rules in the left navigation. Here, you can see a list of all rules that have been created in your MarinOne Client Account.
- Click the check-box next to the rule you would like to duplicate.
- Next, select the Copy Rule button ('two sheets of paper' icon) above the grid.
- This will automatically populate the new rule's name, frequency caps, criteria, and conditions. If you would like to make any updates to these items so that your new rule differs from your original rule, you can do so now.
- Once your new rule is ready, click Duplicate to save your changes.
- That's all there is to it! You'll find your new rule in the grid and it can be edited and managed just like any other social rule.
Creating Rules From The Campaigns Tab
You can also create rules directly from the Campaigns tab. These can be used if you've noticed anything in your campaign performance that will benefit from automated rules.
- Navigate to the Social > Campaigns in the left navigation.
- Click on the Create button ('+' Plus sign icon).
- Select Create Rule from the left-hand navigation.

- Optionally, you can select campaign(s) that you would like to link to your rule. If you do this, the campaigns will be automatically selected in rules creation menu.
- From this point forward, you can create your rule following the guidelines outlined in Creating Rules section of this article.
- When all of your criteria have been entered, click Apply.
Applying Rules
If you would like to apply previously-created rules to a specific campaign, simply follow the instructions below.
- Navigate to the Social > Campaigns in the left navigation.
- Select a campaign by clicking the checkbox next to it.
Note: You'll only be able to select a single campaign in order to apply your rules. - Click on the Edit button ('pencil' icon) above the grid.
- Select Rules from the left-hand navigation.
- From here, you will see a list of the available rules. The left-hand column shows all available rules that are not currently assigned to the selected campaign. The right-hand column shows all available rules that are currently assigned to the selected campaign.
You can select and apply as many rules as you'd like to your chosen campaign. To link or unlink campaigns, simply click on the list of campaigns and it will appear on the Selected (or Available) side. - When you're finished, click Apply to finalize your selection.
Deleting Rules
If you do not want the rule to run anymore, you have 2 options to achieve this:
- Navigate to the Social > Rules in the left navigation.
- You can delete the rule entirely by navigating to the Optimization tab and the Rules sub-tab. From here, select the rule you wish to delete and click the Delete button ('trash can' icon). From here, you can delete multiple rules at the same time.
- Alternatively, you can unlink all campaigns from an existing rule or set of rules. This is the preferred option if you would like to pause your rules, but keep the definition for future use. You can do this by either navigating to the Optimization tab and the Rules sub-tab, then selecting the Edit button ('pencil' icon) and unlinking your campaigns. Or you can navigate to the Campaigns tab, select the Edit button ('pencil' icon) and unlink your campaigns.
Additional Information
- We recommend only using automatic rules for basic activities like pausing/stopping campaigns. More complex tasks e.g. daily optimization should be performed manually.
- Our best practice recommendation is to create no more than five conditions at any time.
