Client Tags are similar to dimensions and can be used to segment your accounts in a variety of useful and interesting ways. They also allow you to run reports across multiple clients and can be viewed in the Clients tab or by drilling into a specific client's account settings in the Settings section.
How To Access This Feature
In order to create new Client Tags, you must have Admin level access to the account in question. Only users with Admin rights can provide other users with Admin access.
To learn more about user management in Marin, check out our Managing Passwords and Users article.
Creating Tags
- The first step, as always, is to log into Marin.
- Once logged in, navigate to the Settings section ('gear' icon) from the top right-hand corner.
- Select the Clients & Users tab and Clients sub-tab.
- Select the client account where you would like to apply client tags. Once you've decided, double-click on the name of the client to launch the Side Panel.
- From the Side Panel, navigate to the Client Tags tab.

- To create a new tag, click + Add Tag.

- Give your new tag a name. This might be something to help you report on certain segments of your business or brand; you could even use a tag that helps differentiate the campaign manager on a specific account. The choice is entirely up to you.
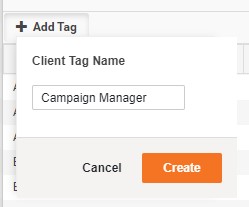
- Once your new tag has a name, click Create.
- Client tags, similar to Marin dimensions, have a top-level tag and a tag value. For example, you might have a top-level tag called "Type" and values such as Search, Social, or eCommerce. Once your new client tag has been created, you'll still want to make sure a tag value has been applied.
To do this, simply find the row corresponding with your new client tag in the Side Panel and double click into the Tag Value column. Click Enter on your keyboard to accept the changes or Esc to cancel your changes. (But hold on! There's one more step to go before you new tag value will be applied.)
To apply multiple tag values to this same client, simply double click into the Tag Value column and apply as many as you'd like. Want to add the same tag to multiple clients at the same time? We'll walk you through this in the Applying Tags Via Multi-Edit section of this article. - Once you're finished adding tag values and have clicked Enter to accept your changes, click Save to finalize your change. If you don't wish to keep your changes, click Cancel.
Applying Tags Via Multi-Edit
Once your Client Tags have been created, they can be applied to additional client accounts via a muli-edit from the Clients tab. You can do so by following the instructions below.
- The first step is to navigate to the Clients tab (Accounts > Clients).
- Next, select the check-boxes next to the clients that you would like to tag with the same value. If you have multiple clients you would like to tag with different values, these should be done with separate multi-edits.
- From there, click the Edit button ('pencil' icon).
- From the drop-down, select the specific Client Tag you would like to apply to the clients that you selected in step 2. Then, type in a value into the available text box. This is an important step, as selecting a client tag but not typing in a value will cause your tag to not be applied properly.
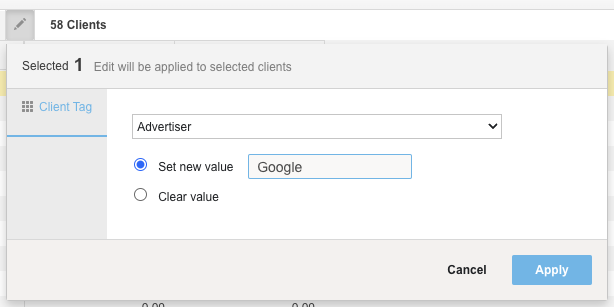
- Once your tag value has been entered, click Apply.
Removing Tags Via Multi-Edit (Untagging)
- The first step is to navigate to the Clients tab.
- Next, select the check-boxes next to the clients for which you would like to remove a Client Tag.
- Select the applicable Client Tag from the drop-down.
- Then, rather than setting a value, toggle the radio button for Clear value.
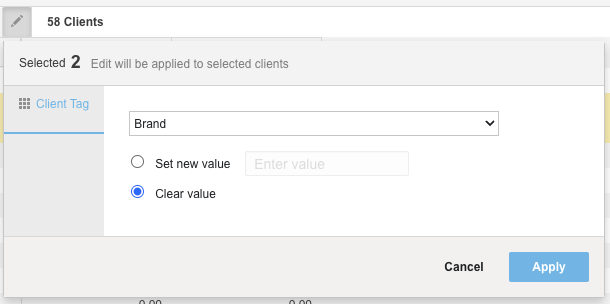
- Lastly, click Apply.
Adding Tags to the Grid
From the Clients tab, click the Column Selector (View Builder) to the top-right above the grid. From here, click into the Client Tags category and you can add columns to the grid for any of your created Client Tags. Simply toggle the check-box for each column to add it to the grid.
Example Tags
Here are just a few possible tags that you can use:
Advertiser
Should be used as the first level tag. Future iterations will include more capabilities that allow you to share settings (e.g. dimensions, conversion types, custom columns) across clients with the same Advertiser tag.
Line Of Business
Can be used to differentiate the different components of your business.
Region
Can be used to differentiate the different geographic locations of your business.
Other tags can be added as you desire, however, for the sake of consistency in your application experience, we suggest using the above three tags before using others.
Frequently Asked Questions
Can I Update Client Tags For Multiple Client Accounts Via A Bulk Upload?
It is not possible to update client tags via bulk upload now. Our engineers are working to add this functionality in an upcoming product release.
Can I Delete Client Tags?
It is not possible to manually delete tags at the moment. If you do need to remove tags, please reach out to our Customer Support team via the Contact Us button on this page.
